Table of Contents
This chapter describes how to configure JEUS Scheduler in a JEUS configuration file or deployment descriptor (DD).
The following configuration is required to use JEUS Scheduler Service.
-
Configuring Scheduler Service on JEUS server
When accessing JEUS server Scheduler Service from a remote server, the Scheduler Service must be activated on the server that executes jobs through Job-list. To active Scheduler Service, you must configure Scheduler Service to start when the server boots.
-
Configure to use Scheduler Service.
-
Configure the thread pool for Scheduler Service.
-
Configure Job-list scheduled to execute on the server.
-
-
Configuring Scheduler Service on the client container
-
Configure in deployment descriptor (DD).
-
To use the scheduler, you must activate Scheduler Service and configure a thread pool and Job-list.
This section describes how to register a job.
You can register a job or schedule it at JEUS server startup in the JEUS configuration file. A job is a single task unit that is scheduled. A job class must implement the jeus.schedule.ScheduleListener interface, and the class and its related classes must be compressed into a JAR file and saved in the following location.
-
Since the following directory is not synchronized between Domain Administration Server (hereafter DAS) and a Managed Server (hereafter MS), you must synchronize them manually.
DOMAIN_HOME/lib/application
-
You must create the following directory.
SERVER_HOME/lib/application
JEUS Scheduler Service executes jobs that are configured on the server.
The following items must be configured with attention.
| Item | Description |
|---|---|
| Begin Time | Initial time to execute the task. If the time is not set, the task executes when the JEUS server starts.
If the Begin Time of a registered job has already passed, the initial execution time is adjusted to a time after the current time. |
| End Time | Time when the task terminates. If the time is not set, the task does not terminate.
If End Time has already passed, the task does not execute at all. |
| Count | Maximum number of executions. If Count is not set or set to -1, there is no limit for the number of executions. |
Note
If a task is registered in the Job-list, the task executes at a fixed rate and therefore maintains a stable execution cycle. But if executing a task is delayed, the task may be executed concurrently by another thread. To ensure this process, you must check if the task object is thread safe.
This section describes how to configure the scheduler on the server using WebAdmin.
To access the JEUS server Scheduler Service or to execute a recurring task on JEUS server using Job-list, Scheduler Service must be activated in WebAdmin. To activate the service, you must configure it for use in WebAdmin. Then, the server starts Scheduler Service at startup.
The following are the steps for adding the job from "2.3.2. Schedule Class Inheritance" to the server.
-
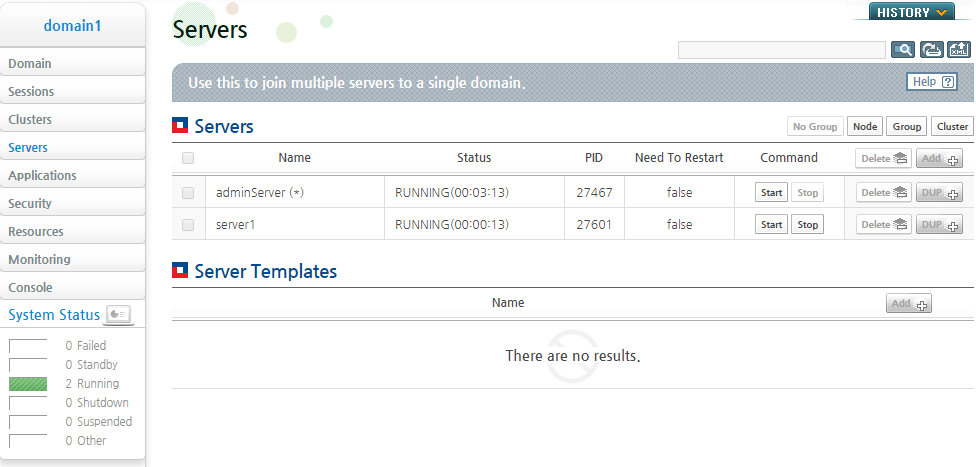
On the left menu, click [Servers] to show the list of servers. Click a server (server1) to change its scheduler configuration from the list.
-
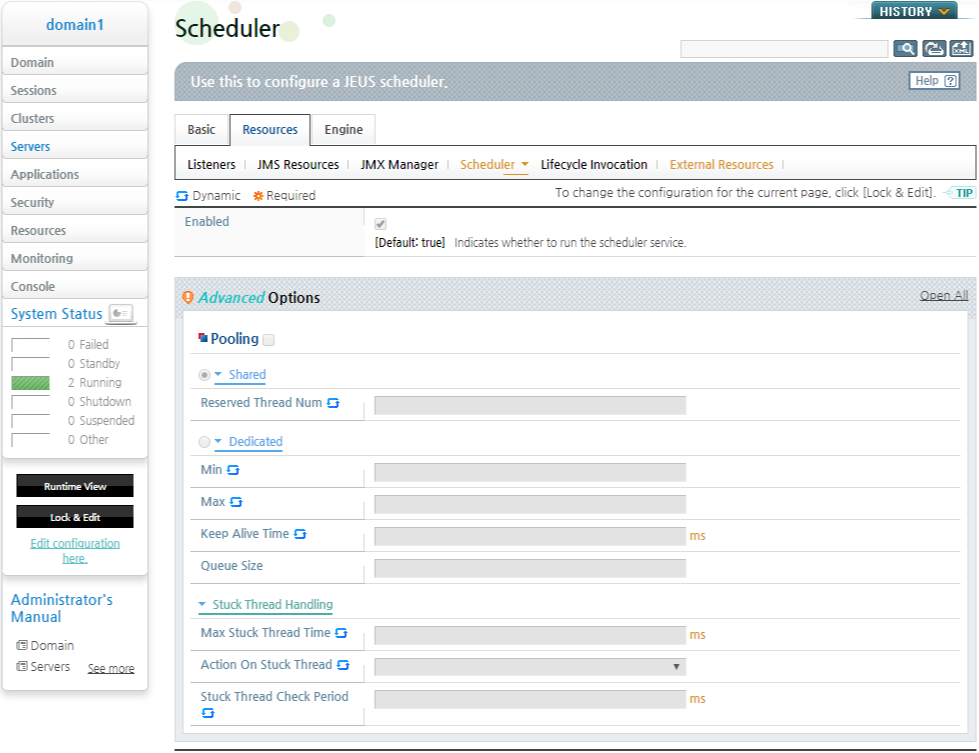
On the Servers screen, select [Resources] > [Scheduler] to go to the Scheduler configuration page.
-
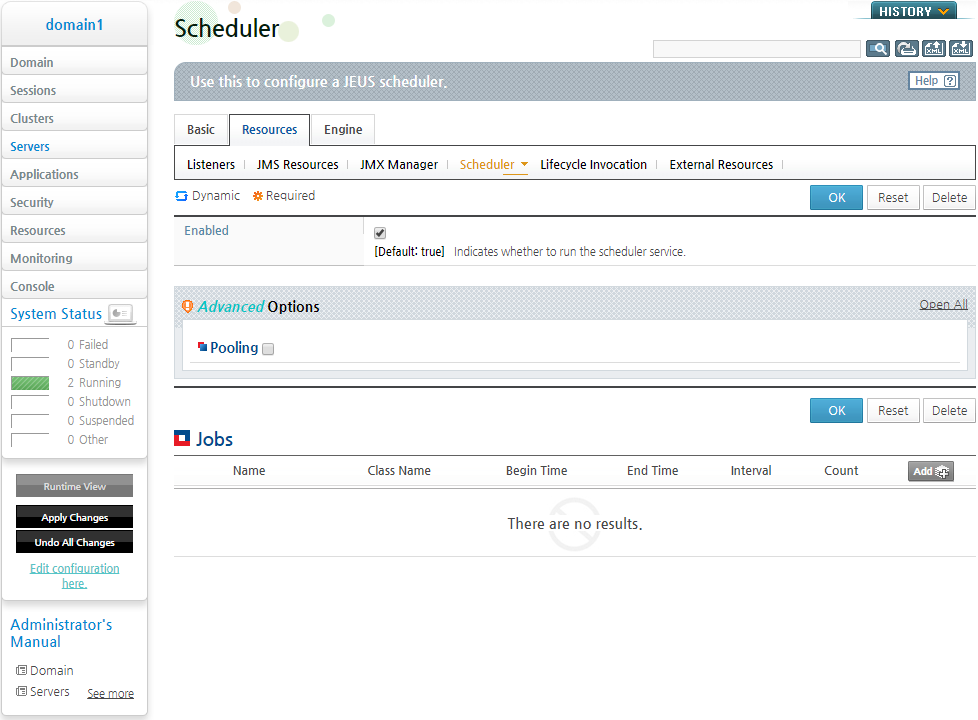
Under the menu in the left, click [Lock & Edit] to get a lock to change the scheduler configurations. For more information about the lock configuration, refer to JEUS WebAdmin Guide. "2.4.4. Locking the Configuration". After getting the lock, you can change the scheduler configuration.
-
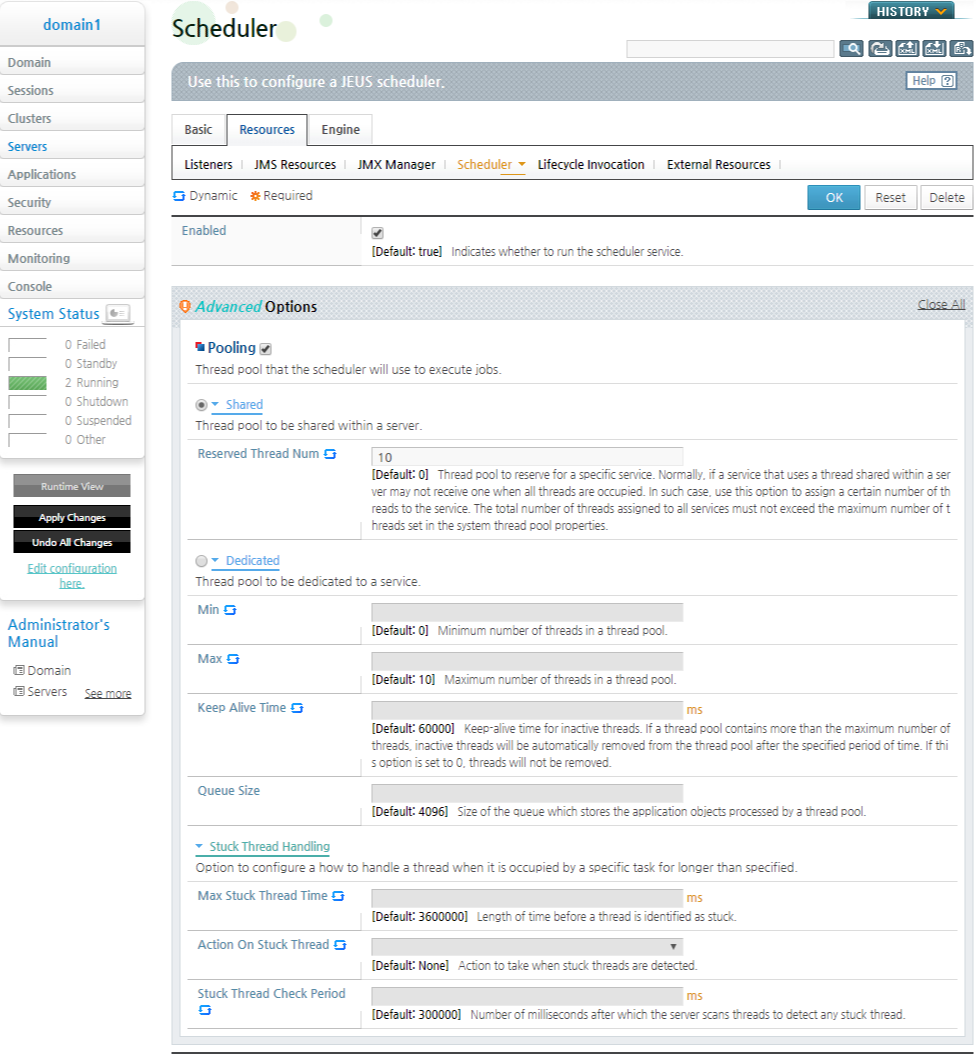
Check 'Enabled' and set the thread pool information in the advanced options that are used in the scheduler. For more information about the scheduler's thread pool, refer to "3.4. Configuring a Thread Pool".
After completing the configuration, click [OK]. If the configuration is saved successfully, the result message is displayed at the top of the page. If 'Enabled' is checked, the result message is not displayed.
-
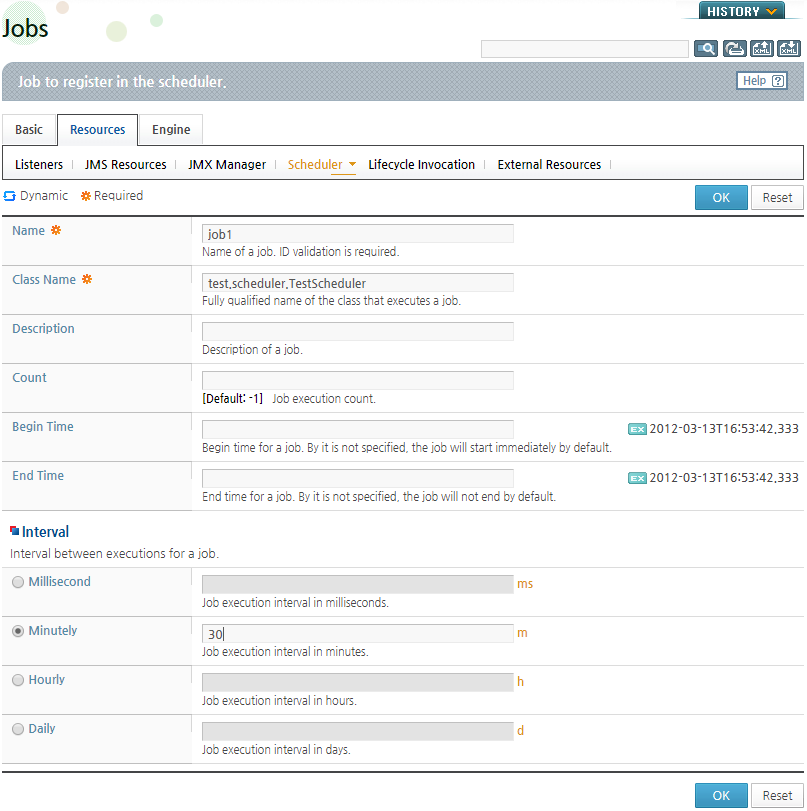
To add a job, click [Add] in the Job list.
-
On the Jobs configuration page, enter the class name and job execution cycle, and then click [OK].
-
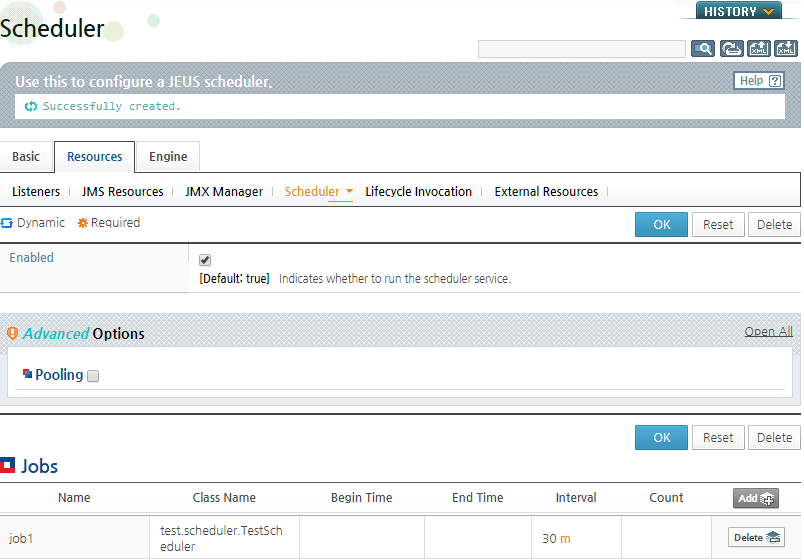
Click [OK] to save the changes temporarily. The following result appears. The result message is displayed at the top of the page and the added job appears on the list of jobs.
-
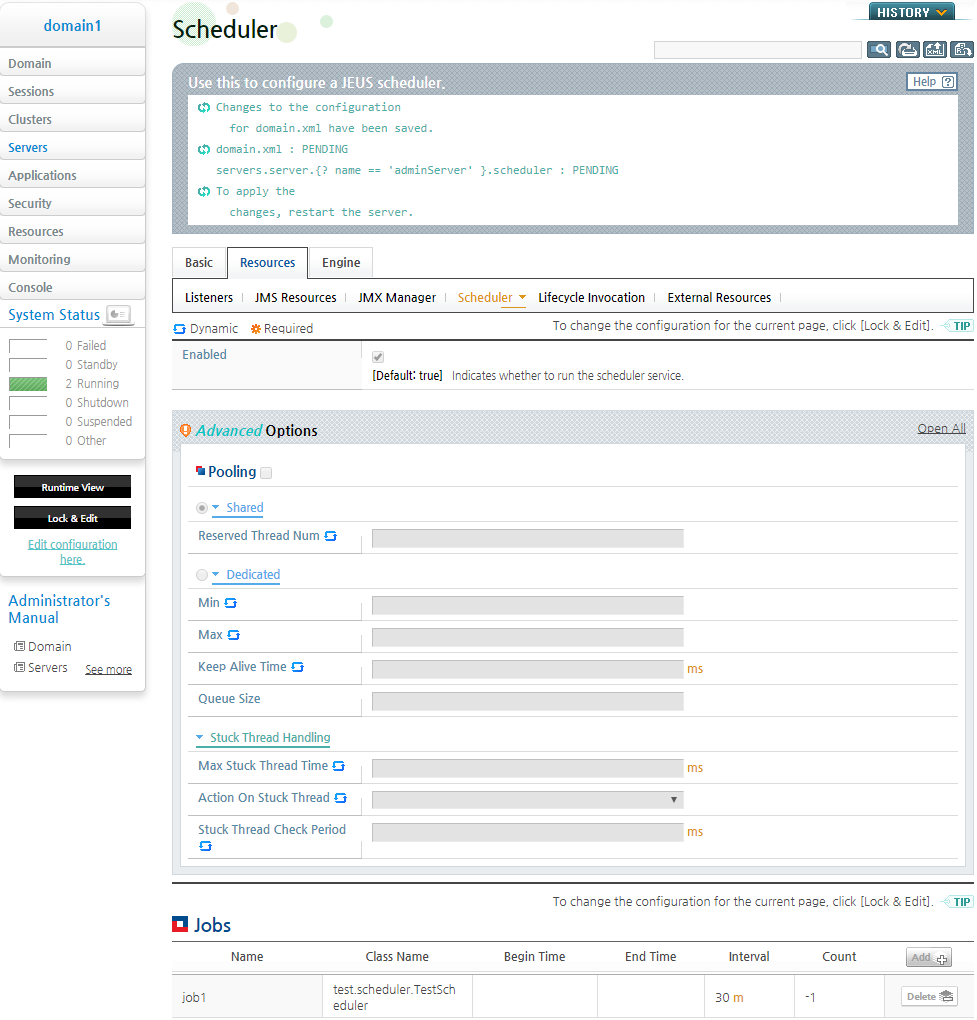
Click [Apply Changes] to apply the changes to the scheduler.
Note
Scheduler configuration changes are not applied dynamically. The changes take effect after the server restarts.
-
When the server restarts, the new job executes and the result can be checked in the server logs.
##### waked on Tue Apr 23 14:50:19 KST 2013
##### waked on Tue Apr 01 15:20:19 KST 2013

Scheduler Service controls a thread pool by adjusting the number of threads required for service execution. A thread pool can be either a shared thread pool that uses the system thread pool or a dedicated thread pool that needs to be created individually.
This section describes how to set a thread pool using WebAdmin and the console tool. For more information, refer to JEUS Server Guide. "2.3.4. Thread Pool Configuration".
If Scheduler Service uses a shared thread pool, you need to configure the number of threads only.
Using WebAdmin
This section describes how to set a shared thread pool using WebAdmin. Before setting the thread pool, you must change the lock setting.
-
On the menu on the left, click [Servers] to view the list of servers ([Figure 3.1]).
Click a server (server1) from the list to go to the server configuration page. On the page, click [Resources] > [Scheduler]to go to the Scheduler page ([Figure 3.2]).
-
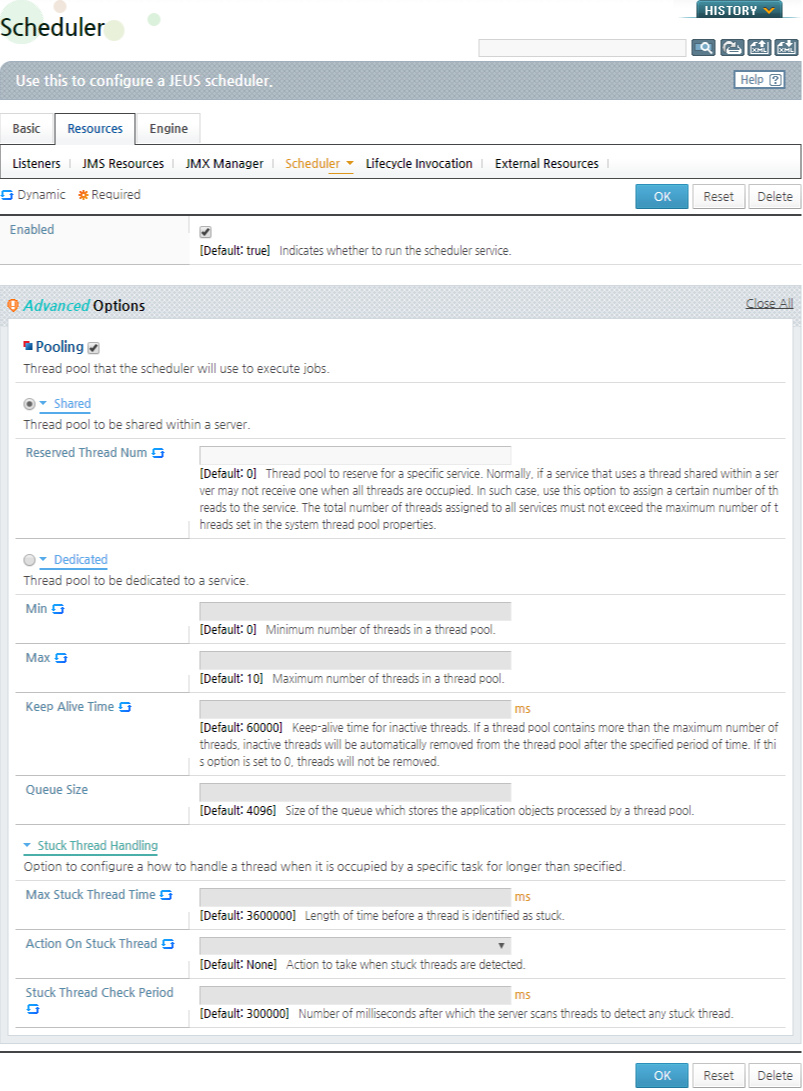
Click [Lock & Edit] to change to configuration mode. In the Advanced Options, configure the thread pool settings. For more information about lock configuration mode, refer to JEUS WebAdmin Guide. "2.4.4. Locking the Configuration".
-
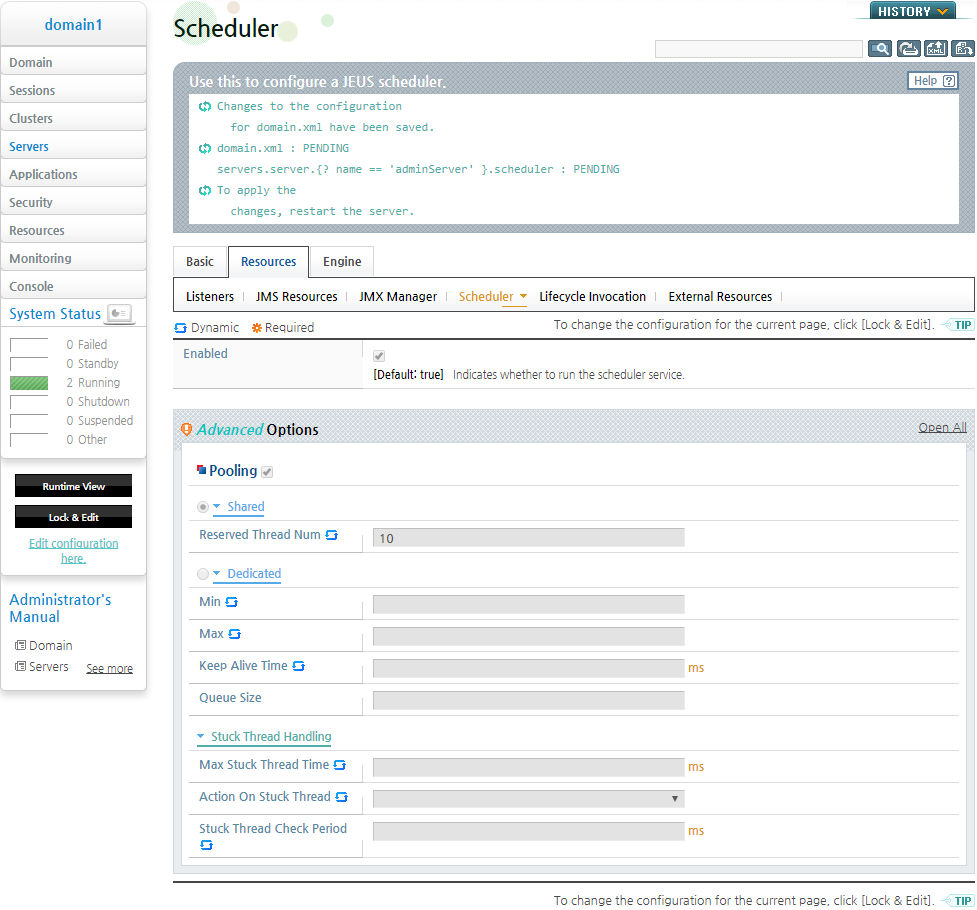
On the Advanced Options page, under Pooling, select 'Shared' and set the number of 'Reserved Thread Num' to 10. Click [OK] to temporarily save the modified configuration and the result is displayed at the top of the page.
-
Click [OK]to save the temporarily changed setting and check the message on saving result at the top of the screen.
-
Click [Activate Changes] to reflect on the server. Once activated, the thread pool configuration of the scheduler is applied on the server and the result is displayed at the top of the page.
Using the Console Tool
The following shows how to set the thread pool of the scheduler using the console tool jeusadmin.
[DAS]domain1.adminServer>modify-system-thread-pool server1 -service scheduler -r 10
Successfully performed the MODIFY operation for The scheduler thread pool of the server (server1).,
but all changes were non-dynamic. They will be applied after restarting.
Check the results using "show-system-thread-pool server1 -service scheduler or modify-system-thread-pool server1 -service scheduler".

[DAS]domain1.adminServer>show-system-thread-pool server1 -service scheduler
Shows the current configuration.
the system thread pool of the server (server1)
================================================================================
+---------------------------------------------------------+--------------------+
| Min                                                     | 0                  |
| Max                                                     | 100                |
| Keep-Alive Time                                         | 300000             |
| Queue Size                                              | 4096               |
| Max Stuck Thread Time                                   | 3600000            |
| Action On Stuck Thread                                  | IGNORE_AND_REPLACE |
| Stuck Thread Check Period                               | 300000             |
| Reserved Threads for the Service transaction            | 0                  |
| Reserved Threads for the Service scheduler              | 10                 |
| Reserved Threads for the Service namingserver           | 0                  |
+---------------------------------------------------------+--------------------+
================================================================================
If Scheduler Service uses a dedicated thread pool, the thread pool can be configured using WebAdmin or the console tool (jeusadmin). This section describes how to configure the dedicated thread pool using WebAdmin and the console tool.
Using WebAdmin
The following describes how to set a dedicated thread pool using WebAdmin. The lock should be set before configuring the thread pool.
-
Click [Servers] on the left menu to view the list of servers ([Figure 3.1]).
Click a server (server1) from the list to go to the server configuration page. On the screen, click [Resource] > [Schedule]to go to the Scheduler screen ([Figure 3.2]).
-
Click [Lock & Edit] to change to configuration mode. In the Advanced Options, set the thread pool configuration. For more information about lock configuration mode, refer to JEUS WebAdmin Guide. "2.4.4. Locking the Configuration".
-
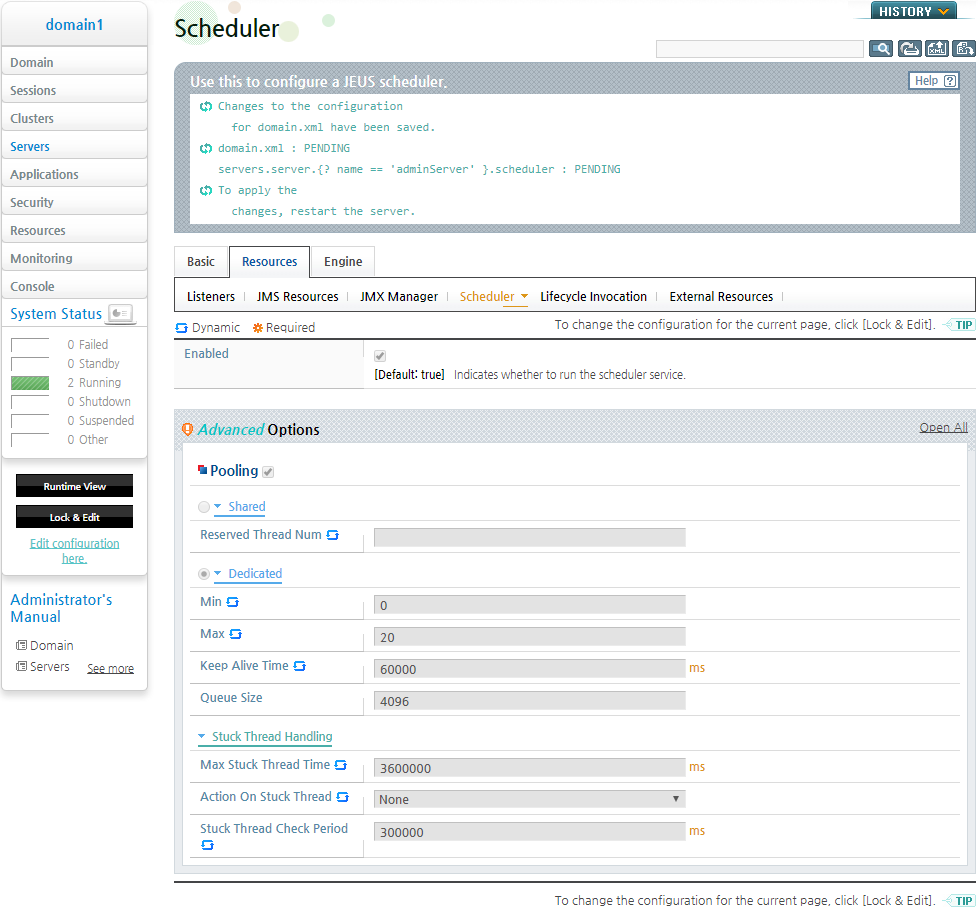
In Advanced Options, mark'Pooling' and select 'Dedicated'. Set 'Min' to 0 and 'Max' to 20, and then click [OK] at the bottom. Click [OK] at the top to temporarily save the modified configuration and the result is displayed in at the top of the page.
-
Click [OK]to save the temporarily changed setting and check the message on saving result at the top of the screen.
-
Click[Activate Changes] to reflect on the server. Once activated, the thread pool configuration of the scheduler is applied on the server and the result is displayed at the top of the page.
Since the thread pool configuration is not applied dynamically to the server, the server must restart. However, the number of pools can be dynamically changed.

Using the Console Tool
The following shows how to configure the scheduler's thread pool using the console tool (jeusadmin).
[DAS]domain1.adminServer>show-service-thread-pool server1 -service scheduler
Shows the current configuration.
==================================================
+------+-----------------------------------------+
(No data available)
==================================================

[DAS]domain1.adminServer>modify-service-thread-pool server1 -service scheduler -min 0 -max 20
Successfully performed the MODIFY operation for The scheduler thread pool of the server (server1).,
but all changes were non-dynamic. They will be applied after restarting.
Check the results using "show-service-thread-pool server1 -service scheduler or modify-service-thread-pool server1 -service scheduler".

[DAS]domain1.adminServer>show-service-thread-pool server1 -service scheduler
Shows the current configuration.
=====================================================================
+---------------------------------------------------------+---------+
| Min                                                     | 0       |
| Max                                                     | 20      |
| Keep-Alive Time                                         | 60000   |
| Queue Size                                              | 4096    |
| Max Stuck Thread Time                                   | 3600000 |
| Action On Stuck Thread                                  | NONE    |
| Stuck Thread Check Period                               | 300000  |
+---------------------------------------------------------+---------+
=====================================================================
Note
The thread pool configuration of the Scheduler Service is dynamic and therefore the server does not need to be restarted. However, the server must be restarted when changing from using the shared thread pool to the dedicated thread pool for changes to take effect.
This section describes how to configure JEUS Scheduler that is running on a client container when using a Java EE application. Add the following <scheduler> element to the JEUS DD file, jeus-client-dd.xml.
[Example 3.1] Client Container Configuration - <<jeus-client-dd.xml>>
<?xml version="1.0"?>
<jeus-client-dd>
    <module-info>
        ...
    </module-info>
    ...
    <scheduler>
        <enabled>true</enabled>
        <!-- Scheduler Thread-pool settings -->
        <pooling>
            <dedicated>
                <min>2</max>
                <max>10</max>
                <keep-alive-time>60000</keep-alive-time>
                <queue-size>4096</queue-size>
                <stuck-thread-handler>
                    <max-stuck-thread-time>3600000</max-stuck-thread-time>
                    <action-on-stuck-thread>None</action-on-stuck-thread>
                </stuck-thread-handler>
            </dedicated>
        </pooling>
    </scheduler>
  ...
</jeus-client-dd>
To apply the changes after modifying the previous configuration file, the JEUS server does not need to be restarted, but client modules and client containers must be restarted.
Note
1. A shared thread pool cannot be used when using Scheduler Service on a client container.
2. For more information about client containers and application clients, refer to "JEUS Application Client Guide".
The following shows how to set jobs that run on client containers.
[Example 3.2] Job-list Configuration - <<jeus-client-dd.xml>>
<scheduler>
    ...
    <job-list>
        <job>
            <class-name>samples.ScheduleJob</class-name>
            <name>ScheduleJob</name>
            <description>This is a sample for scheduler service</description>
            <begin-time>2011-02-01T00:00:00</begin-time>
            <end-time>2011-03-01T00:00:00</end-time>
            <interval>
                <minutely>30</minutely>
            </interval>
            <count>-1</count>
        </job>
    </job-list>
</scheduler>