Table of Contents
This chapter briefly introduces the home screen layout of JEUS WebAdmin and describes how to start and shut down WebAdmin. For detailed instructions about using each menu, refer to the online help.
This section describes the environment configuration required to start WebAdmin, and how to start and shut down WebAdmin using the console tool.
Environment Configuration
To start WebAdmin when starting JEUS, the <enable-webadmin> element in the domain.xml file must be set to true.
[Example 2.1] WebAdmin Configuration - <<domain.xml>>
<domain xmlns="http://www.tmaxsoft.com/xml/ns/jeus" version="8.0">
   ...
   <admin-server-name>adminServer</admin-server-name>
   <system-clustering-framework>
      <heartbeat-address>230.30.1.1</heartbeat-address>
      <heartbeat-port>3030</heartbeat-port>
   </system-clustering-framework>
   <enable-webadmin>true</enable-webadmin>
   <servers>
   ...
</domain>
Permission Setting
A user must be granted the AdministratorsRole role in the policies.xml file to log into WebAdmin.
[Example 2.2] Permission Setting: <<policies.xml>>
<?xml version="1.0" encoding="UTF-8" standalone="yes"?>
<policies xmlns="http://www.tmaxsoft.com/xml/ns/jeus">
    <policy>
        <role-permissions>
            <role-permission>
                <principal>jeus</principal>
                <role>AdministratorsRole</role>
                <classname>jeus.security.resource.RolePermission</classname>
            </role-permission>
        </role-permissions>
        ...
    </policy>
    ...
</policies>
Starting and Shutting Down WebAdmin Using the Console Tool
By default, WebAdmin starts when Domain Administration Server (DAS) starts. WebAdmin can be started and shut down using the console tool, jeusadmin, by following these steps.
-
Starting WebAdmin using the console tool.
Execute the enable-webadmin command to start WebAdmin. For detailed information about the command, refer to JEUS Reference Book. "4.2.3.18. enable-webadmin".
[Example 2.3] Starting WebAdmin Using jeusadmin
[DAS]domain1.adminServer>enable-webadmin
WebAdmin was successfully enabled.
The configuration was changed.
================================================================================
+------------------------------------------------------------------------------+
|                                    result                                    |
+------------------------------------------------------------------------------+
| Successfully applied the configuration changes.                              |
+------------------------------------------------------------------------------+
================================================================================
-
Shutting down WebAdmin using the console tool
Execute the disable-webadmin command in jeusadmin to shut down WebAdmin. For detailed information about the command, refer to JEUS Reference Book. "4.2.3.12. disable-webadmin".
[Example 2.4] Shutting Down WebAdmin Using jeusadmin
[DAS]domain1.adminServer>disable-webadmin
WebAdmin was successfully disabled.
The configuration was changed.
================================================================================
+------------------------------------------------------------------------------+
|                                    Result                                    |
+------------------------------------------------------------------------------+
| Successfully applied the configuration changes.                              |
+------------------------------------------------------------------------------+
================================================================================
Using WebAdmin as an SSL Service
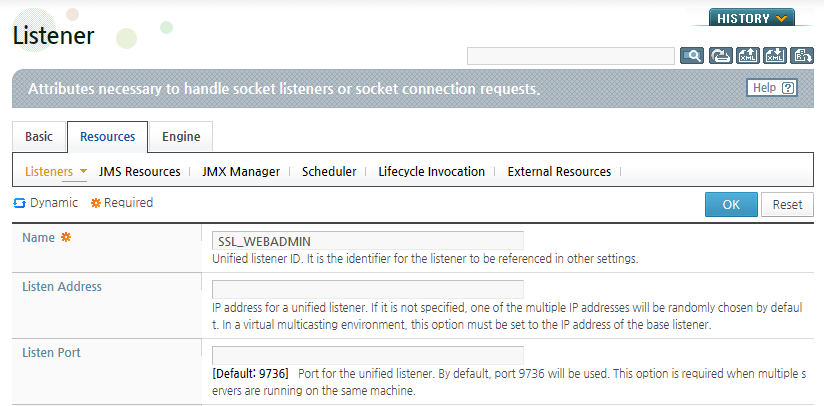
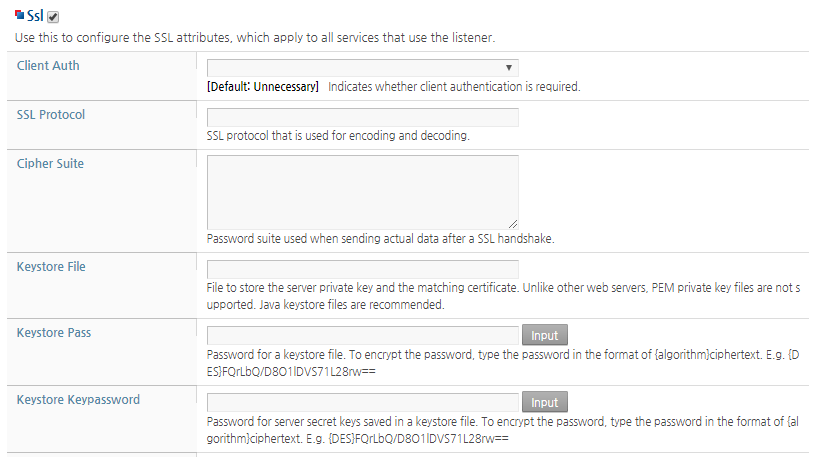
WebAdmin can be used as an SSL service by configuring the Server Listener Ref of the ADMIN-HTTP Listener to the "SSL_WEBADMIN" Listener.
-
Configure SSL after registering the Listener as "SSL_WEBADMIN". For detailed information about Listener configuration, refer to JEUS Server Guide. "2.3.2. Listener Configuration".
-
Modify the Server Listener Ref of the ADMIN-HTTP Listener to "SSL_WEBADMIN".
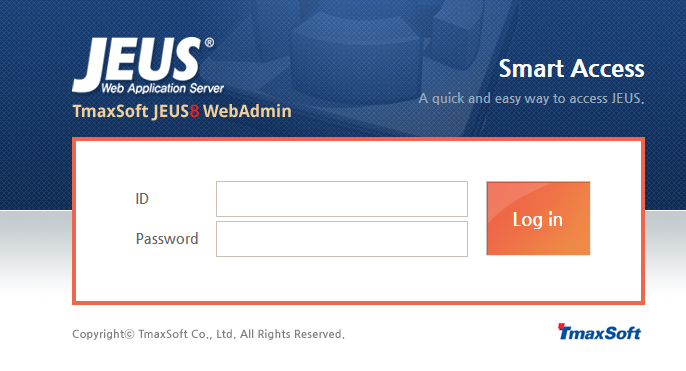
After configuring the WebAdmin environment, log in using a browser.
-
Enter the following address in the address bar of the browser:
http://IP address:9736/webadminNote
9736 is the default listener port for the base listener.
-
The login screen appears. Enter the administrator ID and password and click [Log in].
-
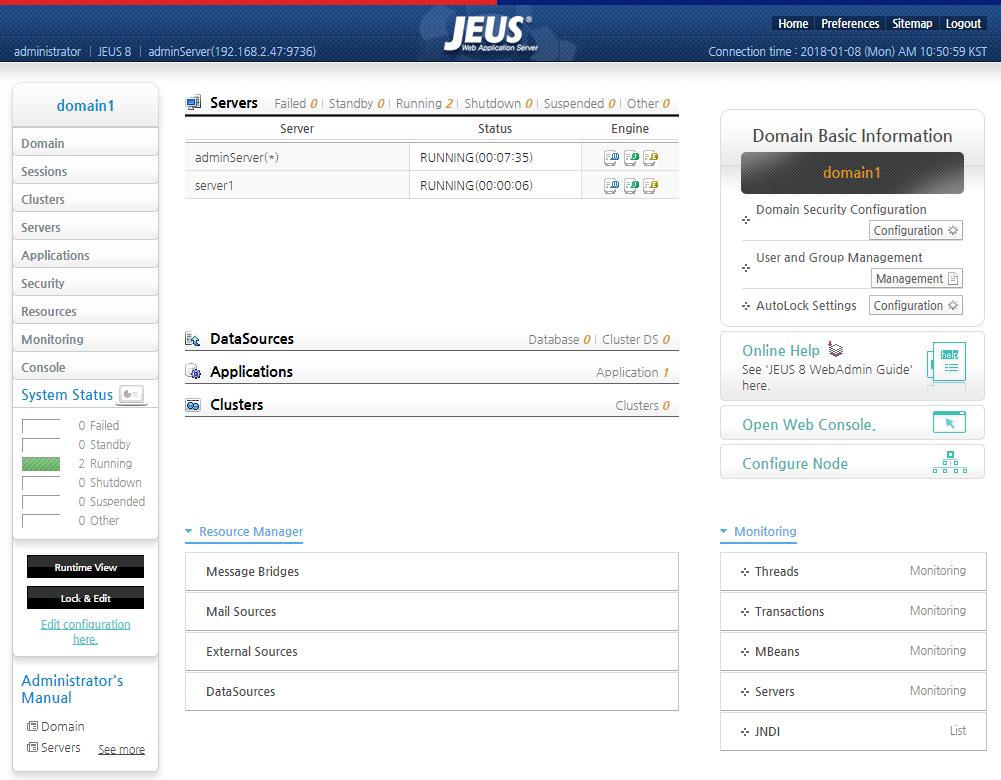
If the login is successful, the home screen appears, and if login fails, an error message is displayed. For detailed information about the main WebAdmin screen, refer to "2.3. Home Screen".
Note
JEUS 8 WebAdmin is optimized for Internet Explorer version 10 or later. If using an earlier version, upgrade to the latest version or use a different browser such as Firefox or Chrome.
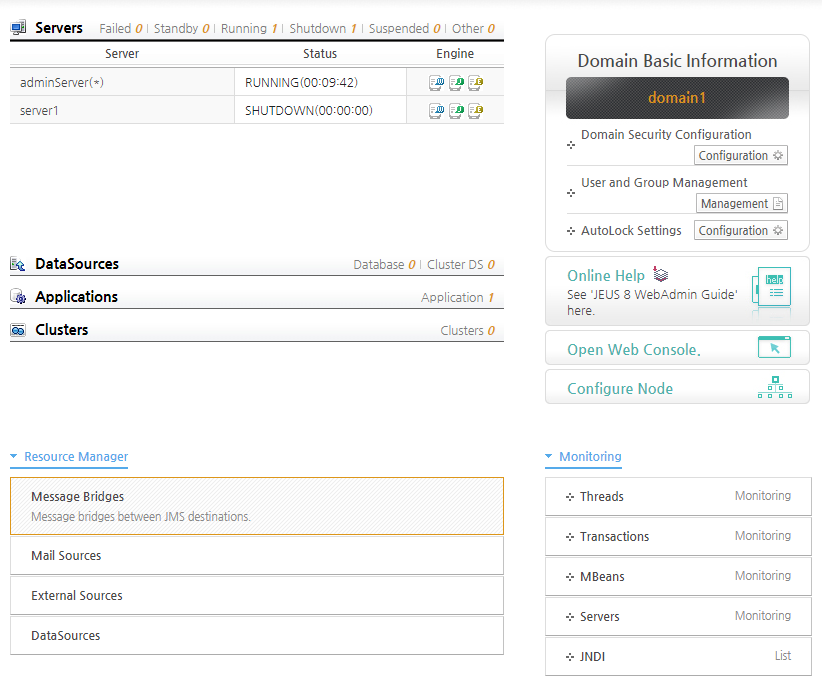
After successfully logging in, the home screen appears. The home screen contains menus that navigate directly to basic monitoring and commonly used functions. Click the [Home] link in the header from any screen to return to the home screen.
The home screen is divided into three sections.
-
Header
Header is located at the top of the screen and shows basic menus and information.
-
Menu
Menu is located on the left side of the screen and shows the main menu, system status, mode change, and other functions.
-
Main
Main is used to control, configure, and monitor items.
The header is located at the top of the screen.
-
Goes to the home screen. Click [Home] to return to the home screen ([Figure 2.5]) from any screen.
-
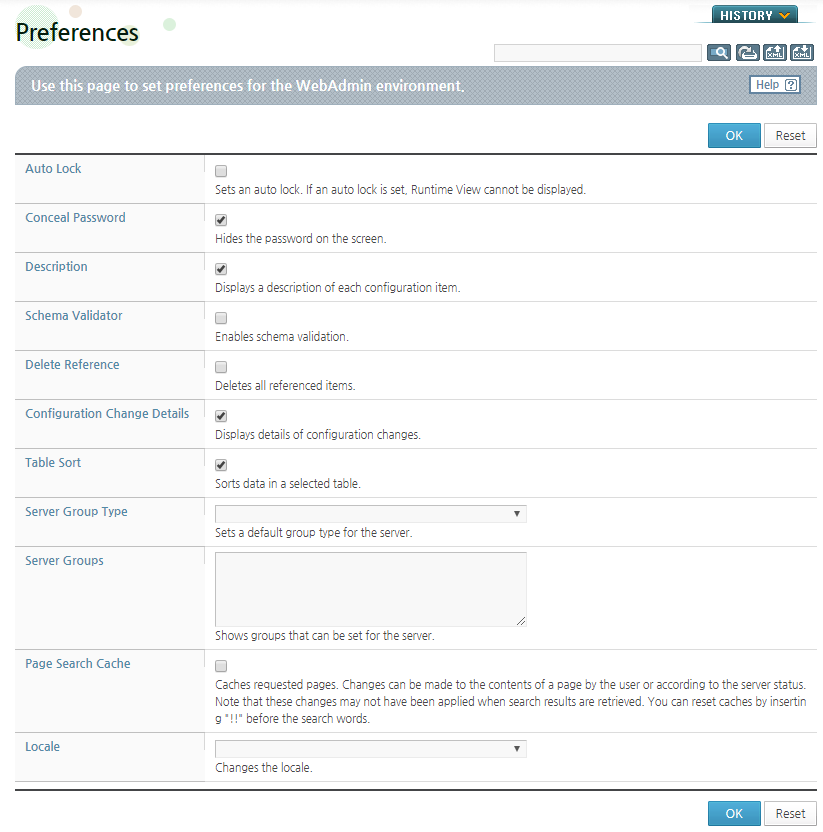
Click [Preferences] to go to the following screen. This screen contains the most important configuration items.
The following describes each configuration item.
Item Description Auto Lock Option to use Auto Lock mode.
If checked, the Standard View, Lock & Edit, and Runtime View modes cannot be used. For detailed information about each mode, refer to "Changing Modes".
Click [OK] after making any changes to apply them to the domain.
Conceal Password Option to hide passwords using asterisks. This, however, does not apply to the logging-in password.
Description Option to display the description of each configuration item. Schema Validation Option to perform schema validation when the configuration is modified and the [OK] button is clicked.
This configuration is normally not used since schema validation is automatically performed when changes are applied.
Delete Reference Option to also delete the field item that references the item that will be deleted.
When deleting an item, a warning message is displayed if another item references it, and the item will not be deleted. However, for some items, deletion of referenced items is supported.
Detailed configuration changes Option to display the result details after applying changes to the domain. Table Sort Option to sort the table by clicking the first column of the sub-table of the main menus such as Servers, Clusters, Applications, and Resources. Server Group Type Option to determine the default server group used during login. The set value is applied to the next login. Server Groups Option to display the list of groups that can be configured by a server. Page Search Cache Option to cache page search results. To initialize cache, prefix "!!" to a search word. (Example: "!! domain")
Note that if this option is used, a search result may not include the latest data.
Locale Option to display the supported locales if any exist.
-
Goes to a screen that displays all primary menus and sub-menus. For detailed information about the primary menus and their sub-menus, refer to "Appendix A. Sitemap".
-
This link logs out. Click [Logout] in the header to terminate the user session and go to the login screen.
-
The following user information is displayed in the header:
-
User Information Description jeus Currently connected user account JEUS 8 JEUS version adminServer(192.169.15.54:9736) DAS name and address Connection time Login time
Click a menu item to go to the related screen or to expand the sub-menu.
The menu consists of the following items.
-
Main Menu
-
System State
-
Changing Modes
-
Administrator's Manual
Main Menu
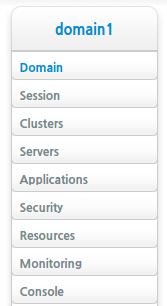
The main menu is the top-level menu and consists of the following items.
The following describes each menu.
| Menu | Description |
|---|---|
| [Domain] | Go to the configuration screen for the domain, which is the largest administration unit in JEUS. For more information on the configuration items in the [Domain] menu, refer to "JEUS Domain Guide". |
| [Session] | Go to the JEUS session configuration screen. |
| [Clusters] | Go to a screen for configuring clusters in the domain. For more information about the configuration items in the [Clusters] menu, refer to "JEUS Domain Guide". |
| [Servers] | Go to the configuration screen for the servers in the domain. For more information about the configuration items in the [Servers] menu, refer to "JEUS Server Guide". |
| [Applications] | Go to the screen where applications can be deployed in the domain. For more information about the configuration items in the [Applications] menu, refer to "JEUS Application & Deployment Guide". |
| [Security] | Go to the configuration screen for security items in JEUS. For more information about the configuration items in the [Security] menu, refer to "JEUS Security Guide". |
| [Resources] | Go to the configuration screen for resources that are used by applications. |
| [Monitoring] | Go to the screen that monitors the resources used by the server. |
| [Console] | Runs the console tool. For more information about the console tool, refer to "2.4.2. Console". |
System Status
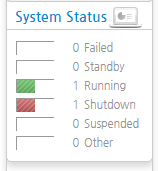
Briefly displays the state of servers that are registered in the domain.
For detailed information about each state, refer to "2.3.3. Main Section".
Mode Change
There are three modes available depending on whether the settings displayed are for a domain or sever, and whether the settings can be modified. The following are the settings for a domain (domain.xml, accounts.xml, policies.xml).
-
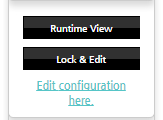
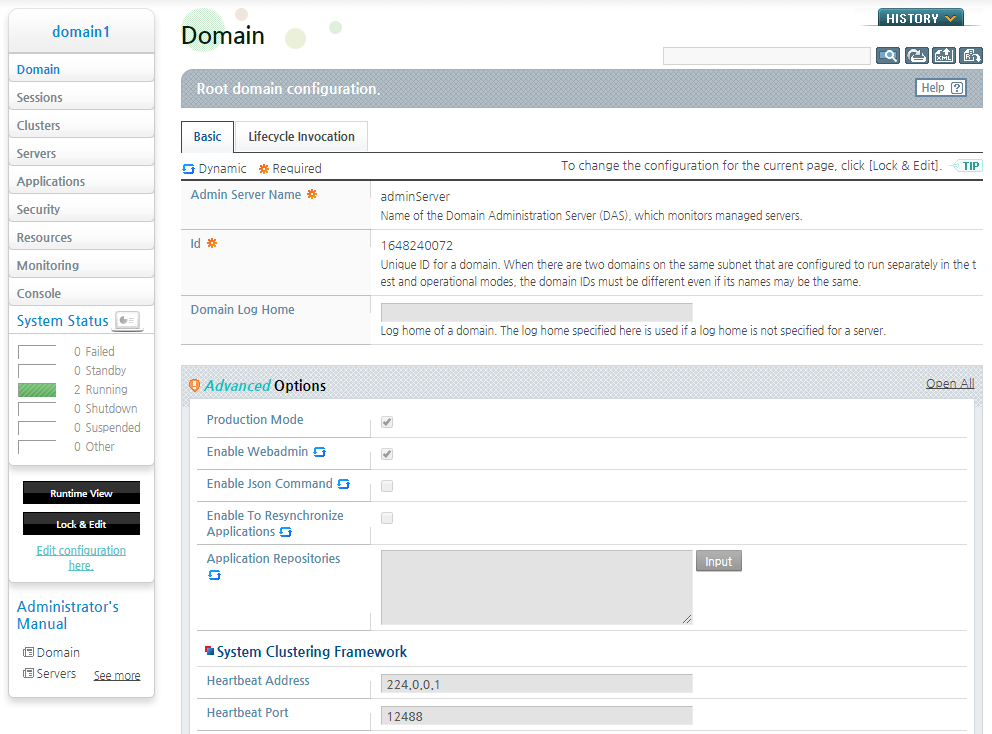
Standard View mode is the read-only mode that allows the viewing of the current configuration. The configuration cannot be changed in this mode. To change the configuration, switch to the Lock & Edit mode.
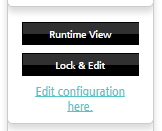
Button Description [Runtime View] Switch to the Runtime View mode. [Lock & Edit] Switch to the Lock & Edit mode. In the Standard View mode, the items are unavailable as shown in the following and the configuration cannot be changed.
-
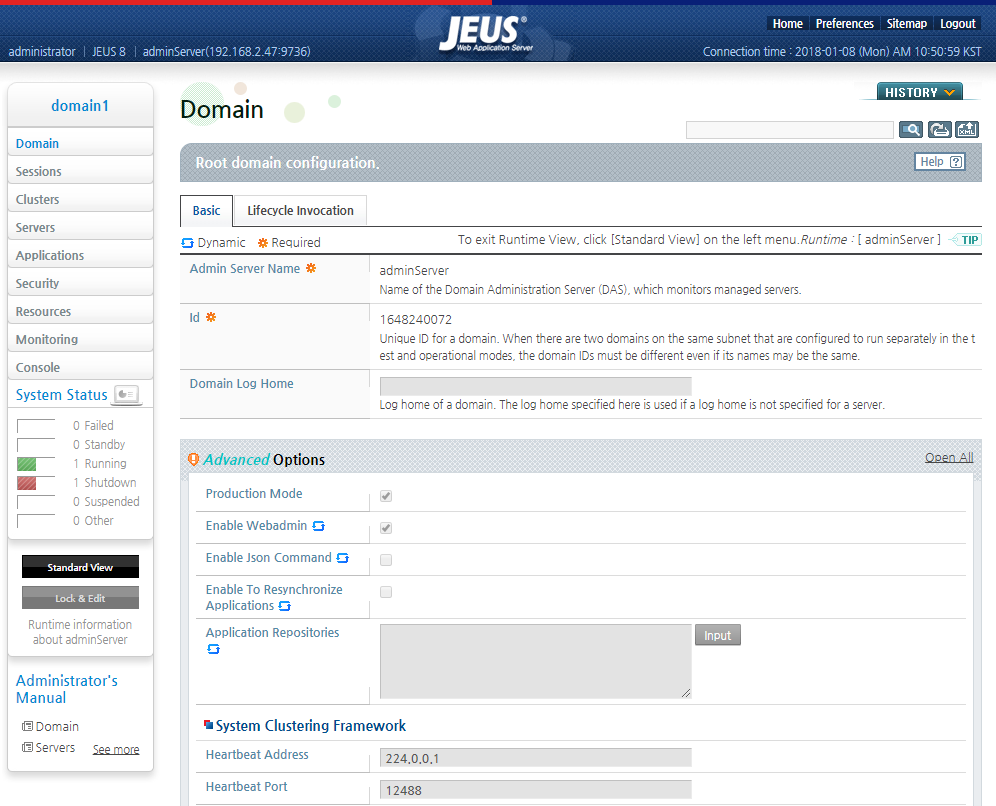
This mode is used to check the current data for each server, and is useful for checking the configuration of the current server. Click [Runtime View] in the Standard View mode to switch to the Runtime View mode.
The Runtime View (
 ) is a separate screen that only displays
information about the items on the current screen. To switch all
screens to the Runtime View, click the Runtime View button on the
left menu. This allows navigation to any configuration screen. For
detailed information about the Runtime View, refer to "common function"
) is a separate screen that only displays
information about the items on the current screen. To switch all
screens to the Runtime View, click the Runtime View button on the
left menu. This allows navigation to any configuration screen. For
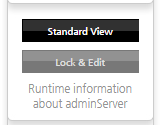
detailed information about the Runtime View, refer to "common function"In the Runtime View mode, the following configuration update menu appears.
The following describes the function of each button.
Button Description [Standard View] Switch to the Standard View mode. [Lock & Edit] Switch to the Lock & Edit mode. This is unavailable in the Runtime View mode. Click [Runtime View] to go to the following server list. Click a server to view its information.
In the Runtime View mode, the home screen is displayed in the following deactivated state, and the configuration cannot be changed.
-
This mode is used to change and apply multiple configurations concurrently. Click [Lock & Edit] in the Standard View mode to switch to the Lock & Edit mode.
Click [Lock & Edit] to switch to the Lock & Edit mode so that the configuration can be changed and applied to the domain. Click [Apply Changes] after modifying the configuration to apply the changes. For detailed information about how to change or revert the configuration, refer to "2.4.3. Changing and Reverting the Configuration".
In the Lock & Edit mode, other users are prevented from modifying the configuration to preserve the integrity of the changes. For detailed information about locking the configuration, refer to "2.4.4. Locking the Configuration".
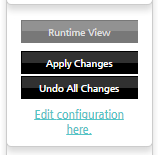
In the Lock & Edit mode, the following configuration update menu appears.
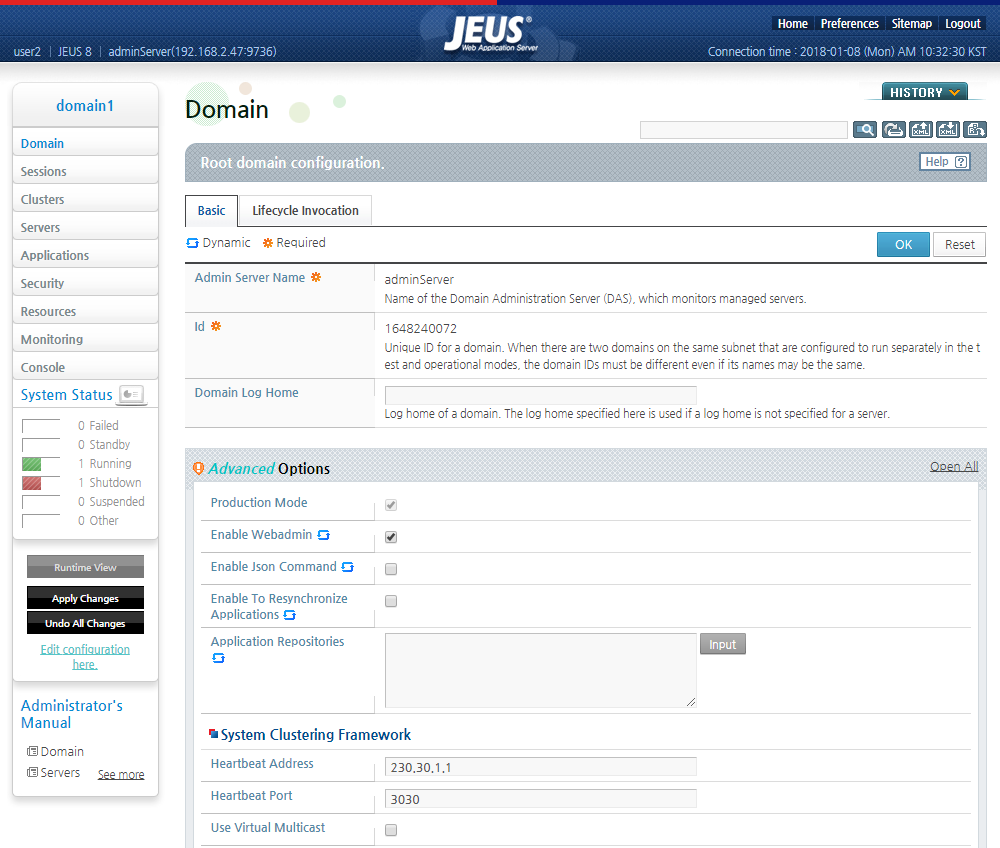
Button Description [Runtime View] Displays current information about each server. This is deactivated in the Lock & Edit mode. [Apply Changes] Apply all changes to the domain. [Undo All Changes] Undo all changes and reset the configuration back to its state before switching to the Lock & Edit mode. In the Lock & Edit mode, each item is activated and configuration can be changed as in the following.
Note
To switch back to the Standard View mode from the Lock & Edit mode, change the configuration and then click [Apply Changes] or [Undo All Changes]. Click [OK] to confirm whether to apply or cancel the changes. The changes are applied or canceled, and then the mode is switched to the Standard View mode.
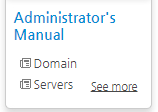
Administrator's Manual
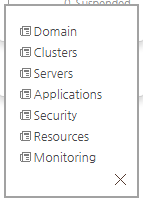
Provides the JEUS online manuals for the main menu.
Click [See more] to view the following menu. This allows easy access to the online manuals.
The main section is the primary work area.
The following are the main functions of the main section.
-
Checking server state
-
Managing resources
-
Configuring and managing basic domain information
-
Accessing online help
-
Running the web console
-
Configuring nodes
-
Monitoring items
-
Commonly used functions
Note
This guide only explains common features and basic functions. For a detailed description of each screen in the main section, refer to the relevant guide.
System Status
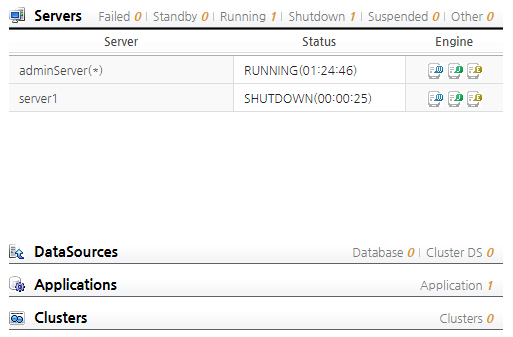
This section is used to check the current system status in JEUS. It displays the server state, datasources, applications, and clusters.
The following describes each part of the section.
-
Servers
Displays the state of the registered servers and provides a link to the server and each web engine.
The server state is displayed in the Status column. The following is a description of each state.
State Description FAILED DAS determined that the connection to the Managed Server has been lost for a specific time period and displays that the MS was shut down abnormally. FAILURE_SUSPECTED DAS determined that it is not connected to the MS and suspects an abnormal shutdown of the MS. STANDBY The server failed to distribute one or more registered applications at startup, so it cannot proceed to the "RUNNING" state. Either modify the module and restart the server, or forcibly start the service by executing start -force. RUNNING The server started and is available. SHUTDOWN The server was shut down or has not been started. SHUTTING_DOWN The server is shutting down. SUSPENDED The administrator executed "suspend" to suspend all applications. In this state, applications can be distributed but not started. RESUMING The server is recovering from the SUSPENDED state. STARTING The server is starting. SUSPENDING The server is suspending all applications because "suspend" was executed. Other Servers with a state of FAILURE_SUSPECTED, SHUTTING_DOWN, RESUMING, STARTING, or SUSPENDING are displayed as "Other" on the menu. -
Data Source
Displays the state of and link to registered data sources and clustered data sources.
-
Applications
Displays the state of and link to registered applications.
-
Clusters
Displays information about and link to registered clusters.
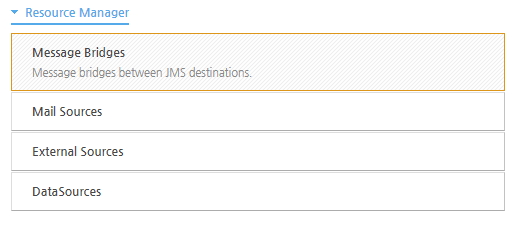
Resource Manager
The Resource Manager section is a sub-menu of the Resources menu. Click an item to go to its configuration screen.
Configuring and Managing Basic Domain Information
This section provides links to domain information and configuration.
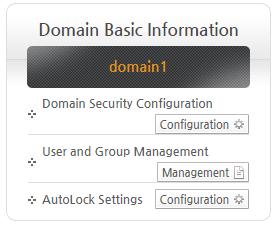
The following describes each part of the basic domain information section.
-
Basic Domain Information
Displays the current domain. Click the domain name to go to its configuration screen. This is the same as clicking [Domain] from the main menu.
-
Domain Security Configuration
This is a shortcut to the domain security configuration. Click [Configuration] to go to the Security Manager screen. This is the same as clicking [Security] from the main menu.
-
User and Group Management
This is a shortcut to User and Group Management in WebAdmin. Click [Management] to go to the Accounts screen. This is the same as clicking [Security] > [SYSTEM_DOMAIN] > [Accounts & Policies Management] from the main menu.
-
AutoLock Settings
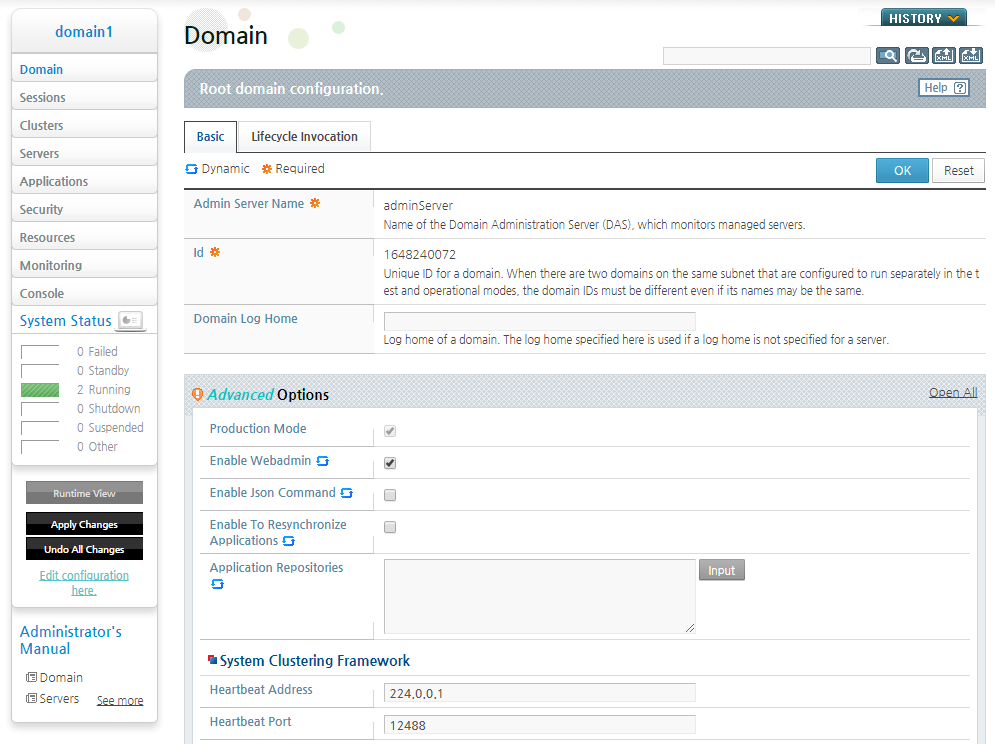
This is a shortcut to AutoLock Settings. Click [Configuration] to go to the Preferences screen. For detailed information about this screen, refer to "2.3.1. Header".
Online Help
Displays help topics for users. The entire JEUS online manual can be viewed, and a new window with FAQ, Forum, downloads, and related web pages appears. For detailed information about online help, refer to "2.4.1. Online Help".
Open Web Console
Executes the console tool. This is the same as clicking [Console] from the main menu. For detailed information about the Web Console, refer to "2.4.2. Console".
Node Configuration
Opens the node configuration screen that shows information about remote servers.
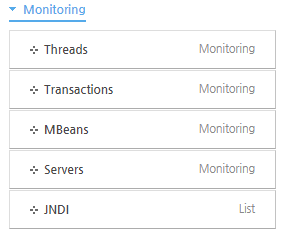
Monitoring
Opens the monitoring screen that shows the current server state. Each screen is a sub-menu of the [Monitoring] link on the main menu.
Commonly Used Functions
The following are commonly used functions of the main section.
-
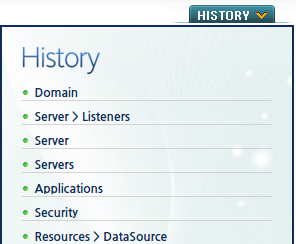
Click [HISTORY] once to view the list of recently viewed screens. Click it again to hide the list. The list contains the last 20 visited screens, and the user can click on any one of them to go to the screen.
This list displays the most recently visited menu at the top and displays each screen only once. This list is removed upon logging out of WebAdmin.
-
Runtime Info/Export/Import/Show Backup Configuration/Search
These functions are displayed as icons in the upper-right corner of the configuration screen. Server information, domain export and import, and backup configurations are also available. They are available from any screen.
The following describes each icon.
-
Runtime View (
 )
)The server-specific configuration of the current screen is displayed in a separate window. It is displayed as
 in the upper-right corner of the
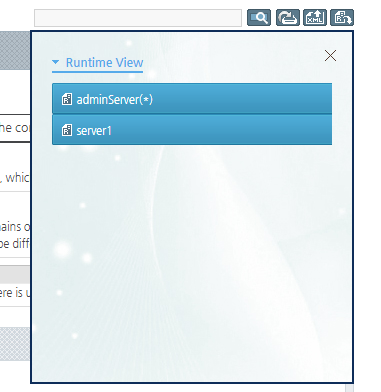
configuration screen. Click it to open the following
Runtime View window.
Click a server to show a new window that shows the configuration information for the selected server in the current screen.
-
Export Domain (
 )
)Exports the current domain.xml file as XML.
-
Import Domain (
 )
)Manually imports the user-modified domain.xml file. This can only be done in the Lock & Edit mode.
All dynamic settings are applied using the imported file.
Caution is required when using this function.
-
Show Backup Configuration (
 )
)Shows backed up configurations and provides the ability to roll back to them.
Rolling back using the domain.xml backup is only available in the Lock & Edit mode.
All dynamic settings are applied using the selected domain.xml file.
Caution is required when using this function.
-
Search (
 )
)Retrieves the pages that contain the search word starting from the current page. Allows the user to search for the pages that contain the search word and locate the desired page.
Since this feature displays the pages that contain the search word but does not highlight the word, the browser search feature should be used instead.
The following describes each search by category.
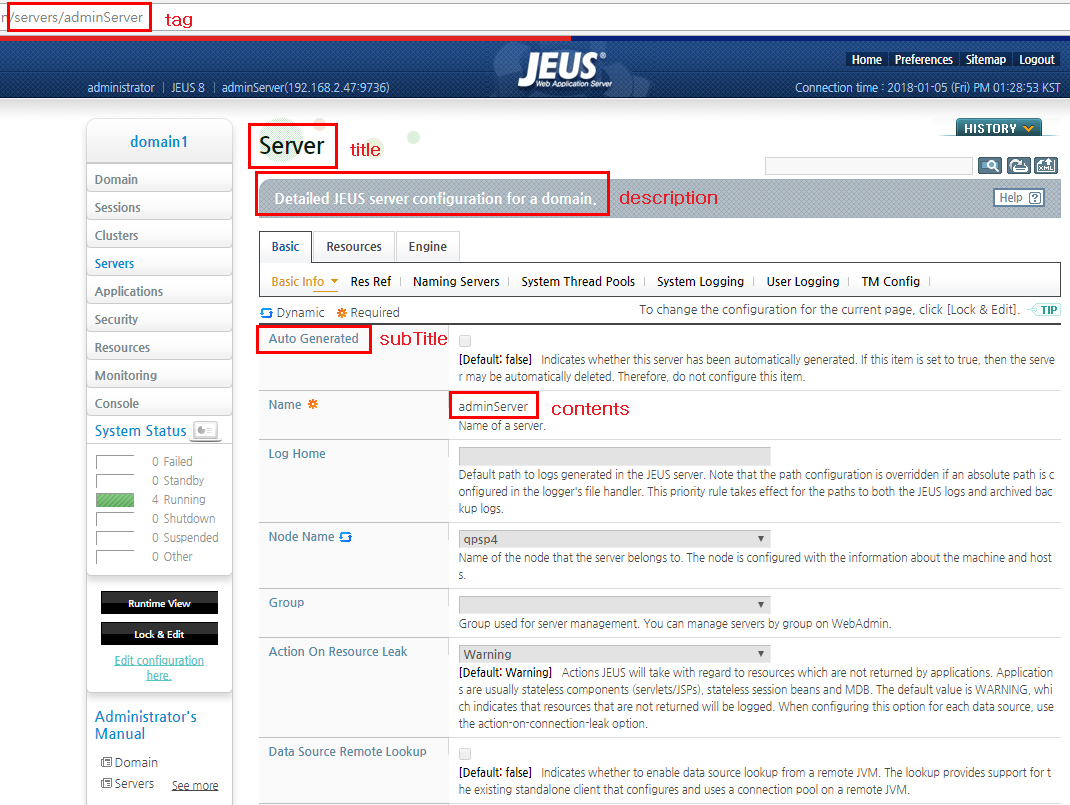
Search By Description title Main title of a page. The title at the top of each page will be searched. For instance, in the following figure, "Server" will be searched. subTitle All titles excluding the main title. Field or table names will be searched. For instance, in the following figure, "Node Name" will be searched. tag Words separated with "/" in the page address will be searched. For instance, in the following figure, if the address is "/servers/adminServer", "servers" and "adminServer" will be searched.
description Description below the main title of a page will be searched. For instance, in the following figure, "The detailed JEUS server configuration for a domain." will be searched. contents All words except for the description will be searched. For instance, in the following figure, "node1" will be one of the searched words. The priority is: title > subTitle > tag > description > contents. If there are too many search results, only the top 10 results are displayed.
Search words including special characters or spaces must be enclosed in double quotes (" ").
-
-
Shows help for the current configuration screen and related topics in a new window.
-
[OK] / [Reconfiguration] / [Delete] Buttons
Configure, modify, or delete items on the configuration screen.
Button Description [OK] Save the changes to the configuration items. The changes are not applied to the domain. To apply the changes, click [Apply Changes].
In the Auto Lock mode, the changes are immediately applied by clicking [OK]. It is not necessary to click [Apply Changes].
[Reconfiguration] Cancel any changes made and return the configuration to the previous state. [Delete] The [Delete] button only exists when all configuration items can be deleted. -
Add or delete data.
-
Install or deploy applications.
-
The menu configuration screen also has an Advanced Options section.
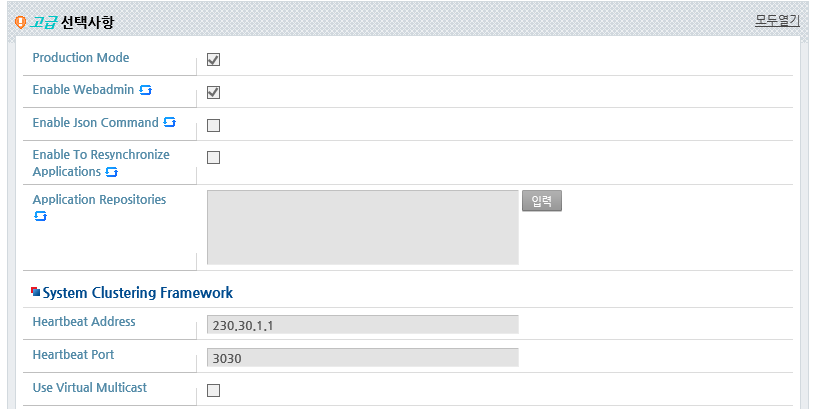
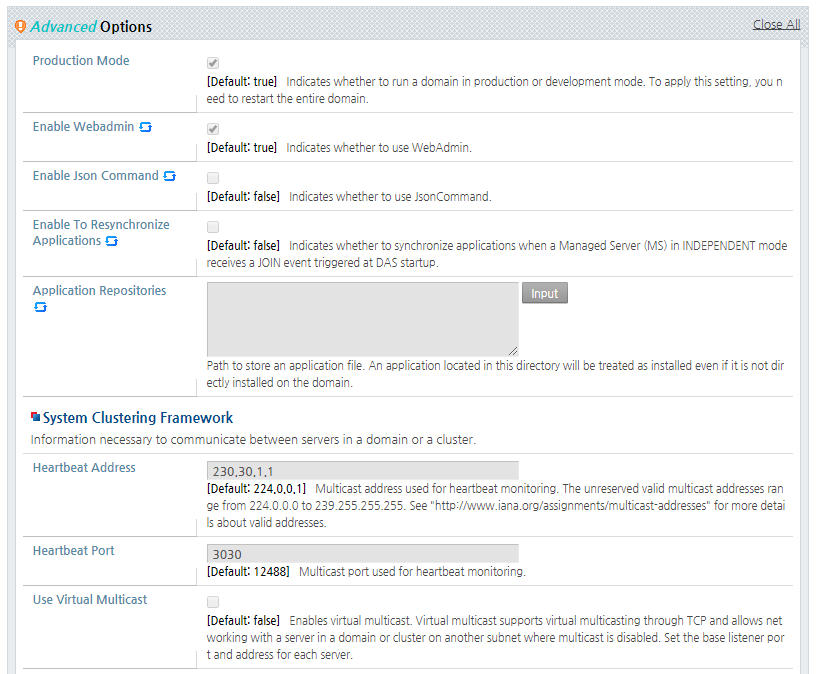
Items in the Advanced Options section are not used very often. Unlike basic configuration items whose description is displayed by default, the description of advanced configuration items are not displayed.
After [Open All] is clicked, the description of each item is displayed and [Open All] is changed to [Close All]. When [Close All] is clicked, then the button changes to [Open All] and the description of advanced configurations is hidden. Click [Open All] to show the description of advanced configuration items.
The following is the advanced options section before [Open All] is clicked.
The following is the Advanced Options section after [Open All] is clicked.
-
The following are the commonly used icons.
Icon Description 
Items that can be dynamic applied 
Required items 
Example 
Link to the web engine. 
Link to the JMS engine. 
Link to the EJB engine.
This section describes WebAdmin's additional functions in detail.
WebAdmin provides online help for each screen. Each help topic is provided as a link to the JEUS manual.
There are several ways to view online help.
-
Click the name of a manual from the main menu. For detailed information, refer to "2.3.2. Menu".
-
Click [Online Help] from the home screen. For detailed information, refer to "2.3. Home Screen".
-
Click [Help] from any configuration screen. For detailed information, refer to "2.3.3. Main Section".
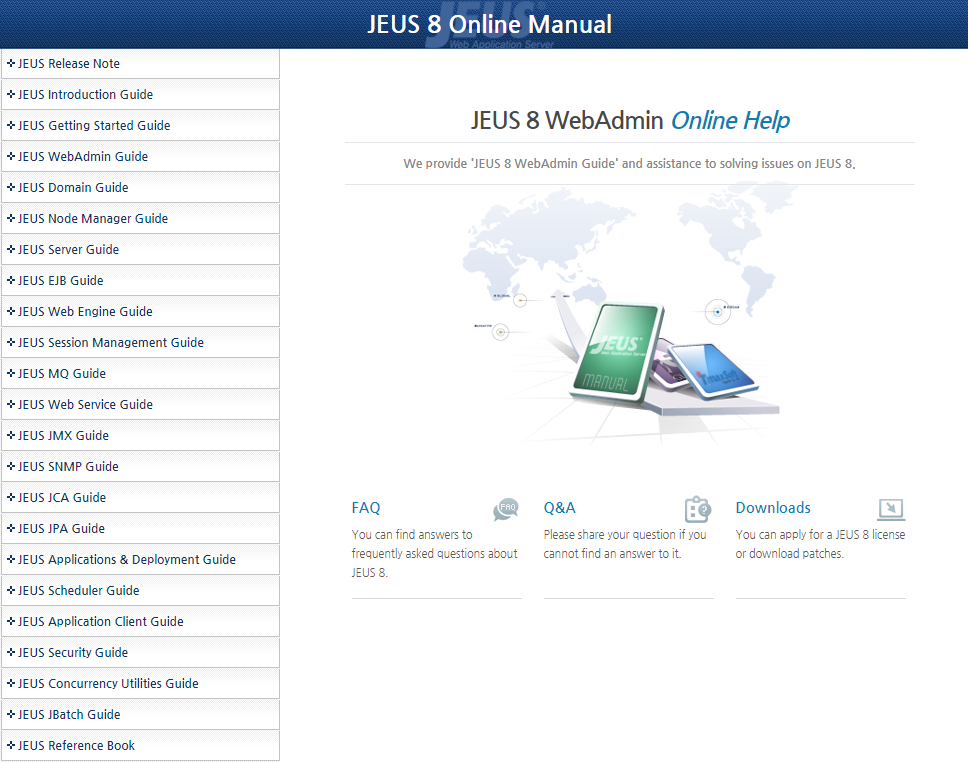
The following are the menus on the online help screen.
-
JEUS manuals
All JEUS manuals are available online, so any manual can be viewed.
-
FAQ
Link to the TmaxSoft TechNet FAQ that provides resolutions for common problems in JEUS.
-
Forum
Link to the TmaxSoft Technet Forum where the user can ask questions about JEUS.
-
Downloads
Link to the TmaxSoft Technet download page that contains related software downloads.
The following is the online help screen.
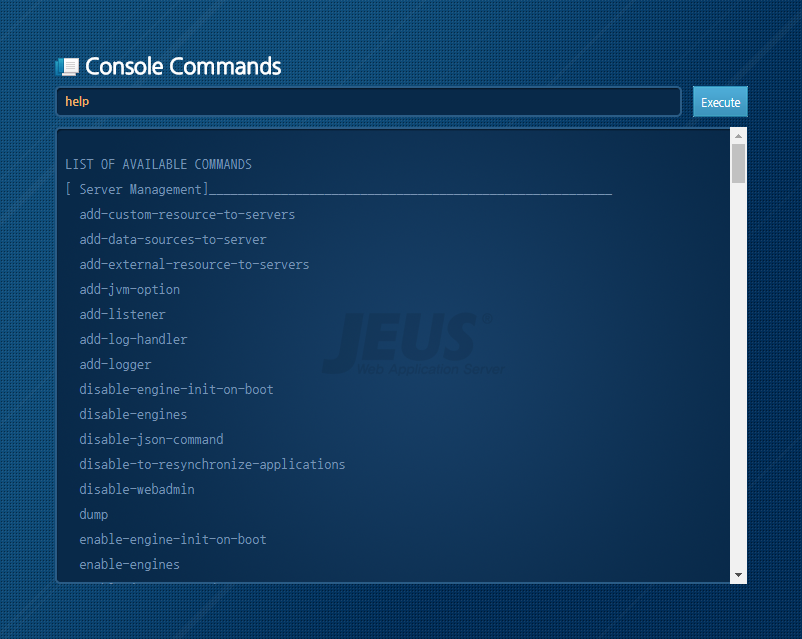
WebAdmin, which is a subnet of jeusadmin, provides console tools that can execute commands related to DAS. However, local commands and unique functions such as repeat, interval, history, and connect are not supported. For a detailed explanation of each command, refer to JEUS Reference Book. "4.2. jeusadmin".
To access the console tool screen,
-
Click [Console] on the main menu. For detailed information, refer to "2.3.2. Menu".
-
Click [Starts a Web Console]. For detailed information, refer to "2.3. Home Screen".
The following shows the Console Command screen in WebAdmin.
This section describes how to change and revert the configuration in WebAdmin.
Changing and reverting the configuration is only possible in the Lock & Edit mode.
Changing the Configuration
The following are the steps for changing the configuration.
-
Switch to the Lock & Edit mode by clicking [Lock & Edit] from the Standard View mode.
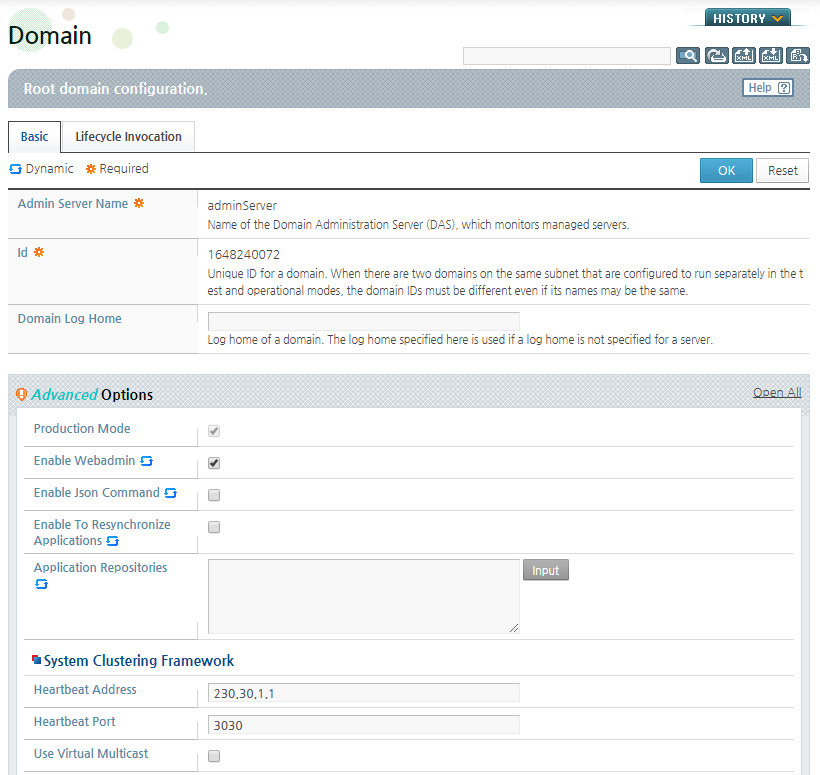
In the Lock & Edit mode, configuration items can be changes as in the following example.
-
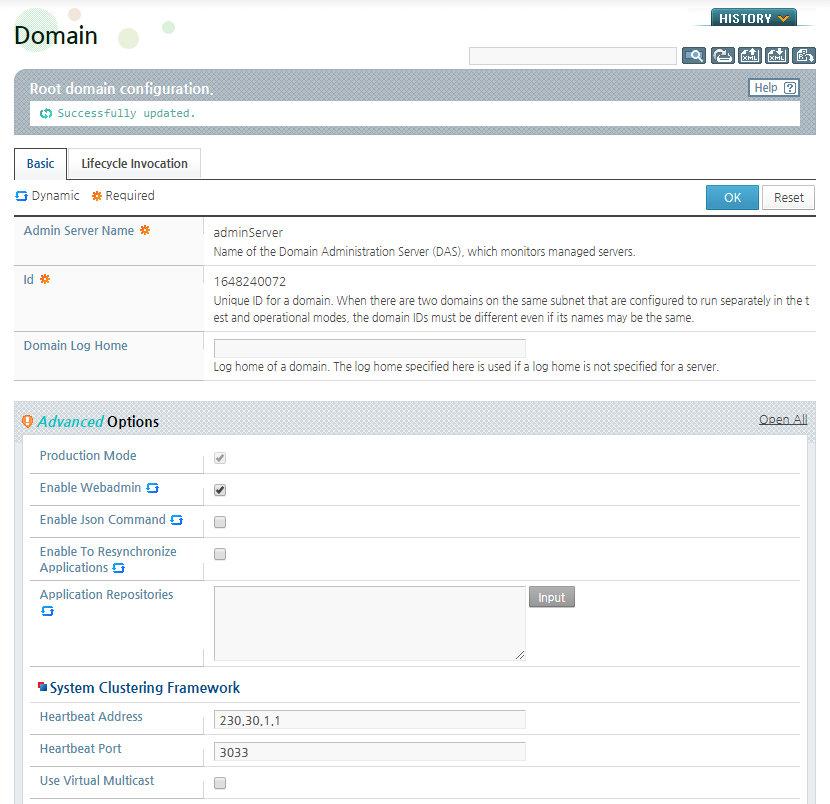
Change the configuration and click [OK]. In this example, 'Heartbeat Port' was changed from '3030' to '3033'.
-
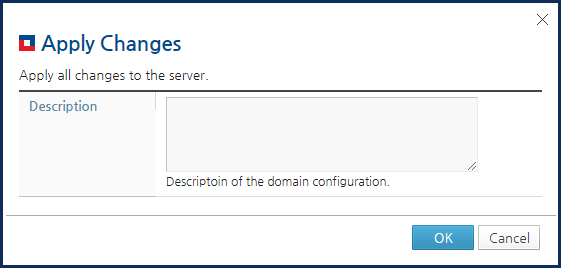
After making the changes, click [Apply Changes] to apply the changes to the server. Next, click [OK] in the following confirmation window that appears.
If no description is entered, the existing description is used.
-
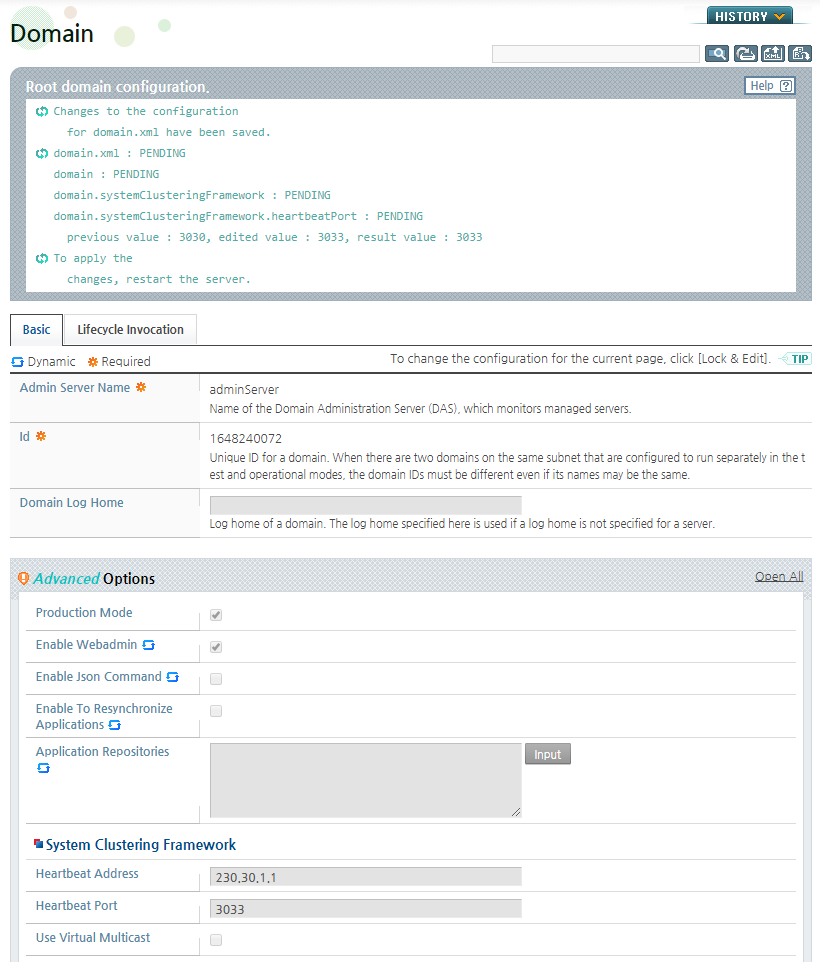
When the configuration information is applied to DAS, the following result message is shown and the mode automatically switches from the Lock & Edit mode to the Standard View mode.
Reverting Configuration Changes
The following are the steps for reverting any changes to the configuration.
-
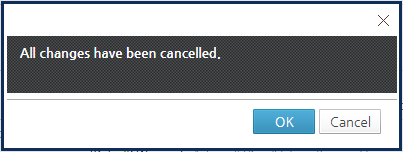
After modifying the configuration in the previous section, click [Undo All Changes] to revert the changes instead of applying them to the server. Click [OK] in the confirmation window that appears.
-
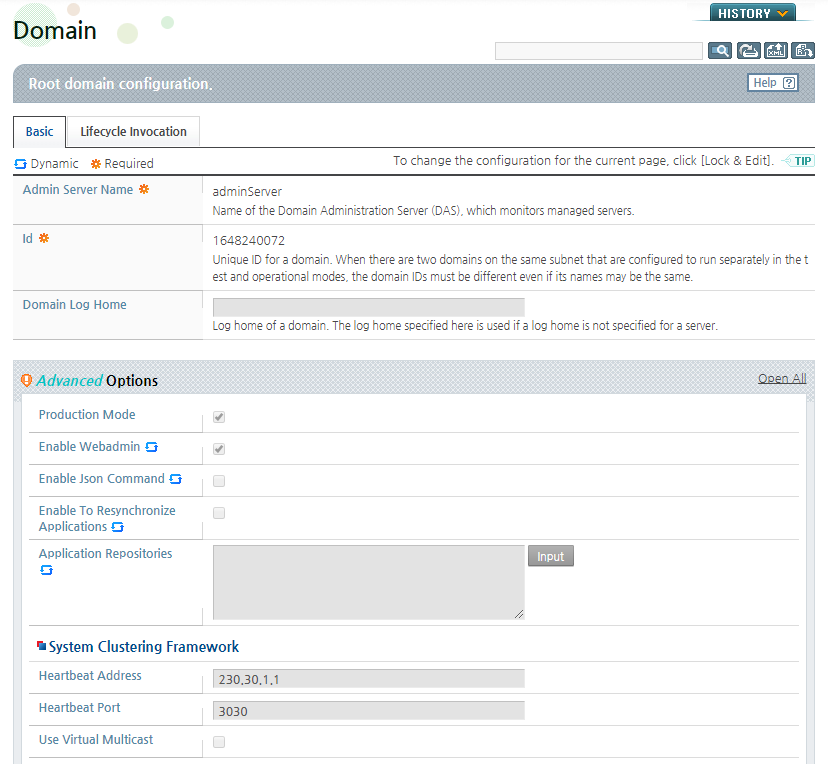
Verify that the changes have been reverted. Heartbeat Port, which was changed from "3030" to "3033", has been reverted, and the mode automatically switched from the Lock & Edit mode to the Standard View mode.
JEUS WebAdmin provides a configuration lock feature for a specific user, not for a session. Only the user who has the lock can change the configuration.
The user has the lock until the user clicks [Apply Changes] to apply the changes or [Undo All Changes] to revert the changes. As long as the lock is not returned, the user can continue editing even if the user logs out and logs back in again.
Acquiring the Lock
The lock is not automatically returned. If the user does not return the lock, other users cannot make changes. To prevent this from occurring, other users can forcibly acquire the lock as in the following example.
-
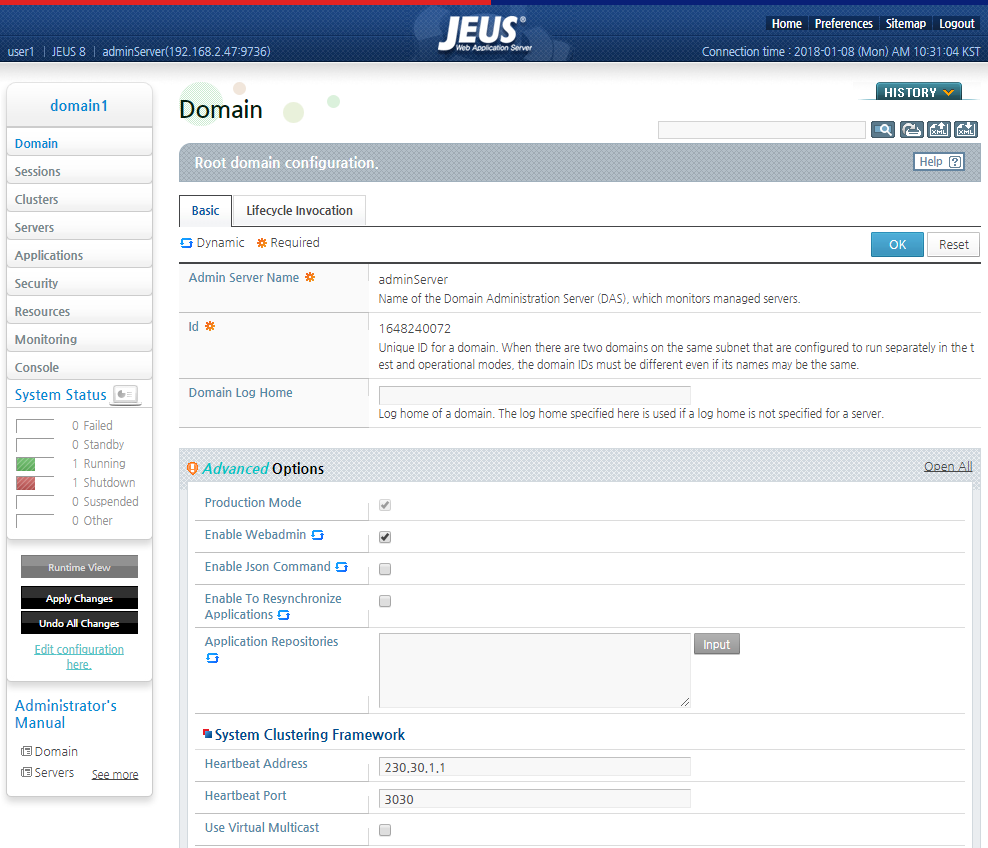
A user, user1, logs in and acquires the lock by clicking [Lock & Edit]. The user does not apply or revert the changes, and logs out while still in the Lock & Edit mode.
-
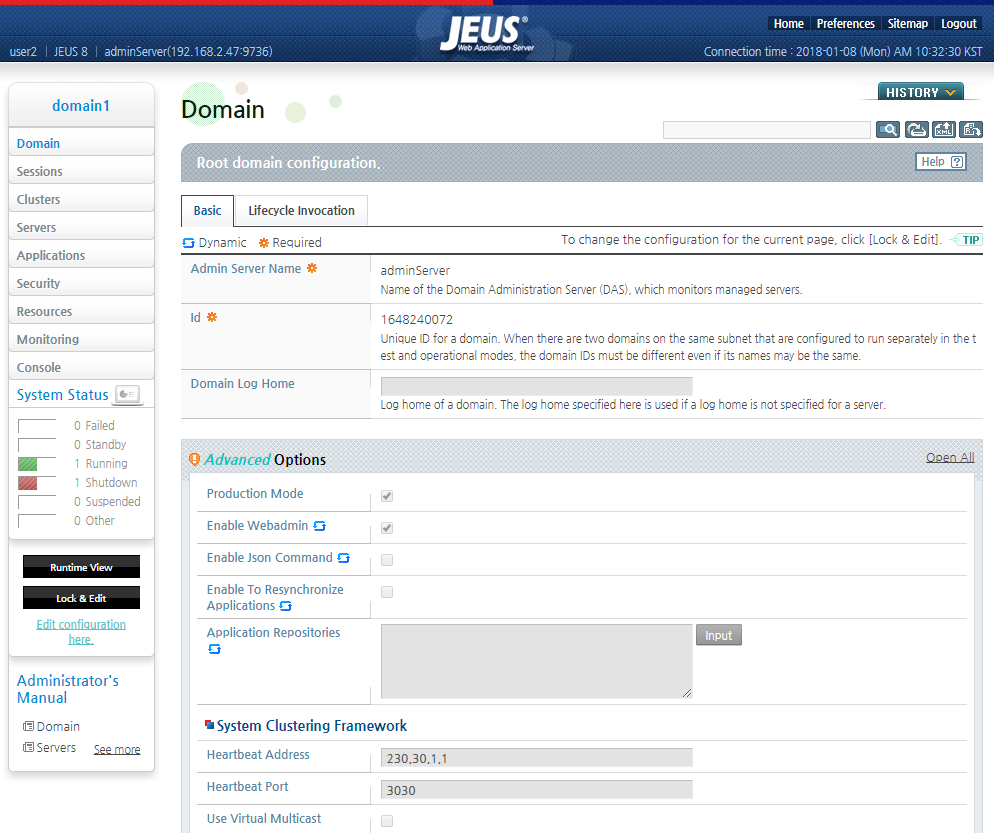
Another user, user2, logs in.
-
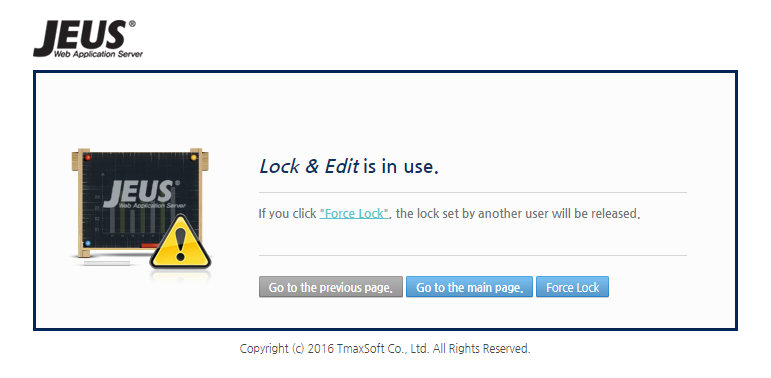
If user2 clicks [Lock & Edit] to try to change the configuration, the following warning message is displayed that says another user is using the Lock & Edit mode.
User2 acquires the lock by clicking [Force Lock].
Note
When the lock is forcibly acquired, all changes made by the previous lock owner are lost.
-
The configuration screen changes to the following Lock & Edit mode.
