This chapter describes main features of the [MIGRATOR DASHBOARD] menu in the project detailed mode.
Provides a dashboard displaying an overview of asset migration information.
-
In the project detailed mode, go to the [MIGRATOR DASHBOARD] menu.

-
The migrator dashboard opens and displays at-a-glance view of asset migration information.
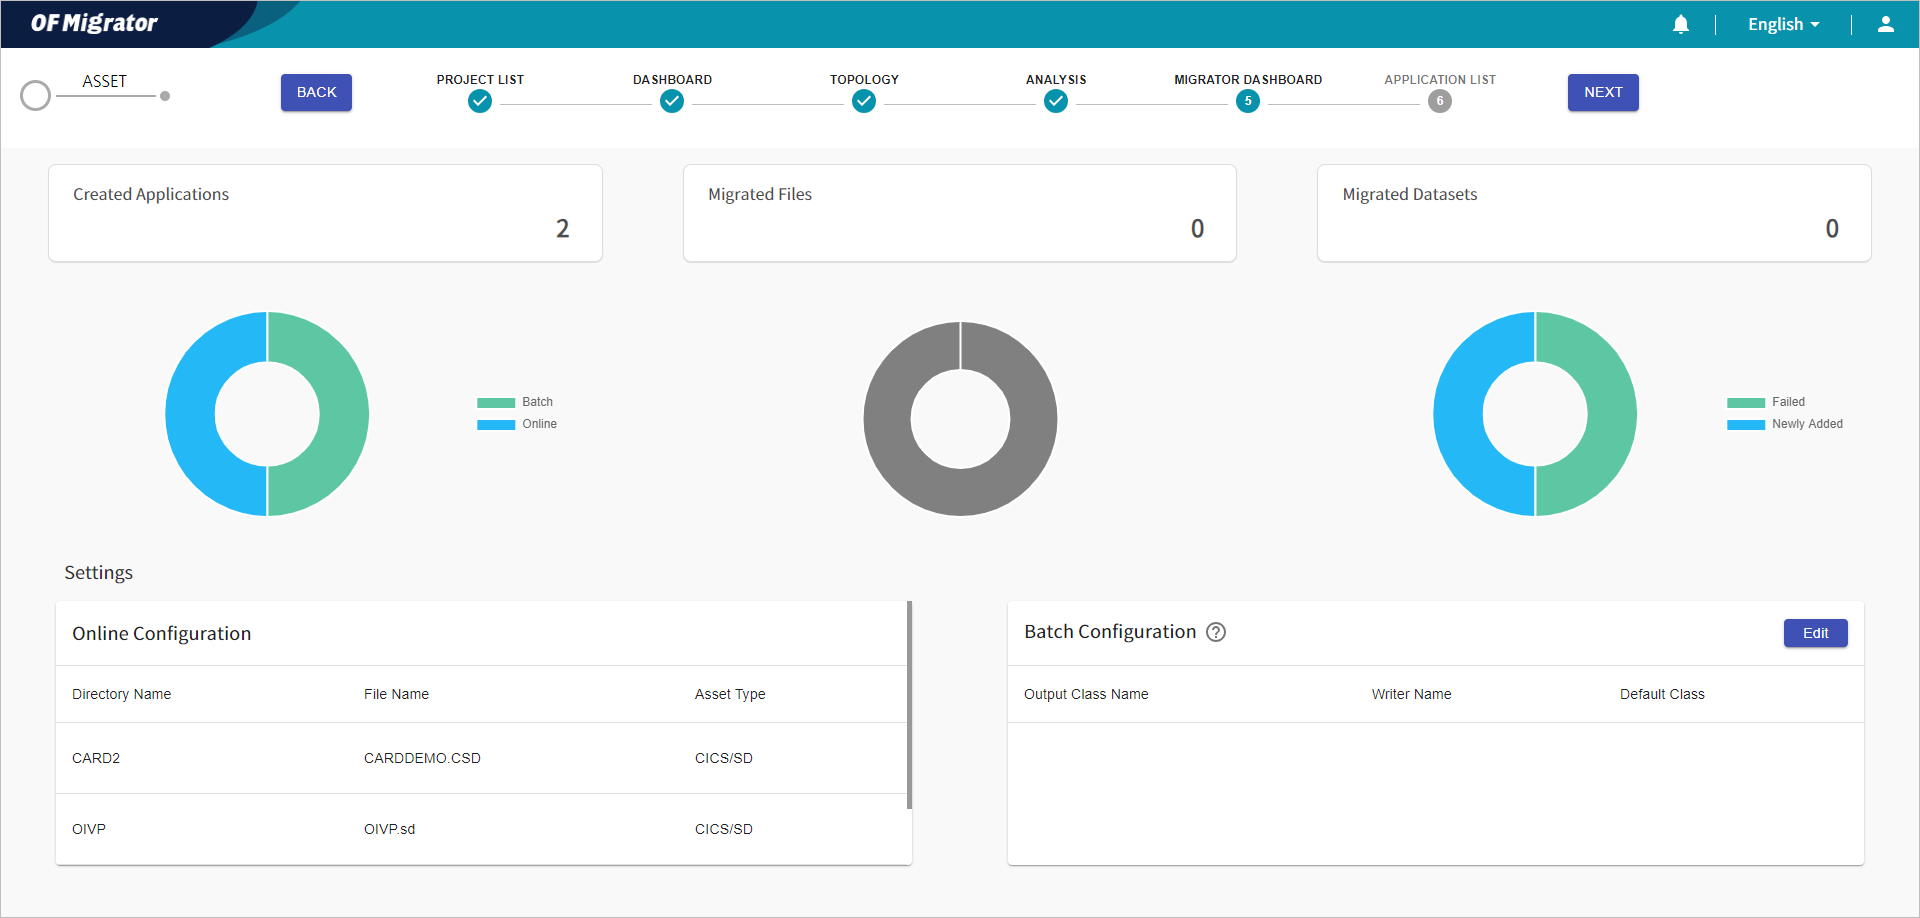
The dashboard provides the following information:
Item Description Created Applications
Current number of created applications.
Hovering the mouse over the donut chart shows the number of applications by type.
Migrated Files
Number of asset files that have been successfully migrated.
Hovering the mouse over the donut chart shows the number of asset files by type.
Migrated Datasets
Number of datasets that have been successfully migrated.
Hovering the mouse over the donut chart shows the number of datasets based on their migration status.
Online Configuration
Configuration information for online applications.
-
Directory Name: Name of the directory to which the asset belongs.
-
File Name: File name of the asset.
-
Asset Type: Type name of the asset.
Batch Configuration
Configuration information for batch applications.
-
Output Class Name: Name of the output class configured in the batch application.
-
Writer Name: Writer name assigned to the output class.
-
Default Class: Option to decide whether to use as the default output class.
Note
When clicking the legends for each data, you can show and hide the corresponding data on the chart.
-
You can modify the output class information of the batch application.
-
In the project detailed mode, go to the [MIGRATOR DASHBOARD] menu.
-
When the migrator dashboard appears, click the [Edit] button in the 'Batch Configuration' section.

-
In edit mode, you can click the value of each item to modify the configuration settings. In addition, you can add a class by clicking the
 button at the bottom of the list and delete a class by clicking the
  button.
The following describes each item.
Item Description Output Class Name
Enter the name of the output class to be configured in the batch application.
Writer Name
Enter the writer name to be assigned to the output class.
Default Class
Select whether to operate as the default output class. In this case, only one output class can be designated as the default.
-
After editing the configuration settings, click the [Save] button.
