Table of Contents
This chapter provides examples of developing and deploying an entity using stateless session beans and the Java Persistence API.
A session bean consists of a business interface and a bean class.
Example of an EJB
The following example shows a stateless session bean that has a method that displays helloejb.
-
Business Interface
[Example 10.1] <<Hello.java>>
package helloejb; import javax.ejb.Remote; @Remote public interface Hello { String sayHello(); } -
Bean Class
[Example 10.2] <<HelloBean.java>>
package helloejb;

import javax.ejb.Stateless;

@Stateless(mappedName="helloejb.Hello")
public class HelloBean implements Hello {

    public String sayHello() {
        return "Hello EJB!";
    }

}
The sample file is in the following path.
JEUS_HOME/samples/getting_started/helloejb/helloejb-ejb/src/java/helloejb
Example of a Servlet Client
The following is the implementation of a servlet client that calls helloejb.
[Example 10.3] <<HelloClient.java>>
package helloejb;

import java.io.*;
import javax.ejb.EJB;

import javax.servlet.*;
import javax.servlet.http.*;

public class HelloClient extends HttpServlet {
    @EJB(mappedName="helloejb.Hello")
    private Hello hello;

    protected void processRequest(HttpServletRequest request,
        HttpServletResponse response)
    throws ServletException, IOException {
        PrintWriter out = response.getWriter();
        try {
            // Call session bean business method.
            String msg = hello.sayHello();

            response.setContentType("text/html");
            out.println("<html>");
            out.println("<head>");
            out.println("<title>HelloClient</title>");
            out.println("</head>");
            out.println("<body>");
            out.println("<center><h1>" + msg + "</h1></center>");
            out.println("</body>");
            out.println("</html>");
            out.close();
        } catch(Exception ex){
            response.setContentType("text/plain");
            ex.printStackTrace(out);
        }
    }

    protected void doGet(HttpServletRequest request,
        HttpServletResponse response)
    throws ServletException, IOException {
        processRequest(request, response);
    }

    protected void doPost(HttpServletRequest request,
        HttpServletResponse response)
    throws ServletException, IOException {
        processRequest(request, response);
    }

}
The sample file is in the following path.
JEUS_HOME/samples/getting_started/helloejb/helloejb-war/src/java/helloejb
The sample code can be built using jant as in the following.
%JEUS_HOME%/samples/getting_started/helloejb>jant build
After the sample code has been built successfully, an EAR file is created as '%JEUS_HOME%/samples/getting_started/helloejb/dist/helloejb.ear'.
A packaged EJB application can be deployed using WebAdmin or console.
Deploying an EJB Application in WebAdmin
This section describes how to deploy an EJB application in WebAdmin.
-
Log in to WebAdmin using a web browser.
-
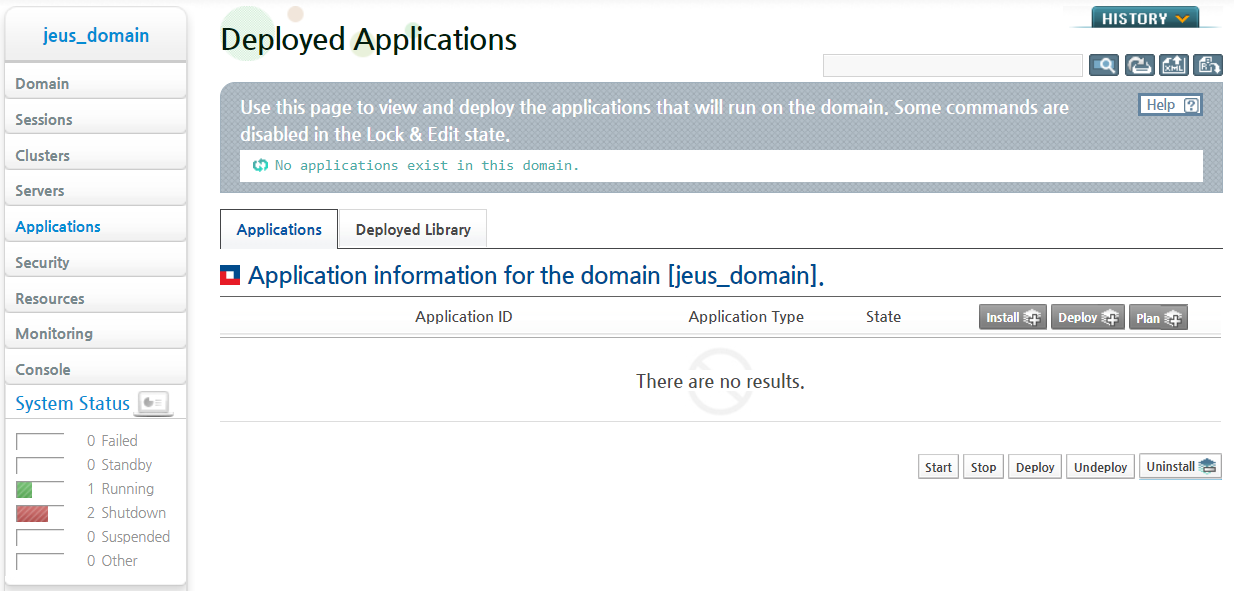
Click [Applications] from the left pane to go to the application list page.
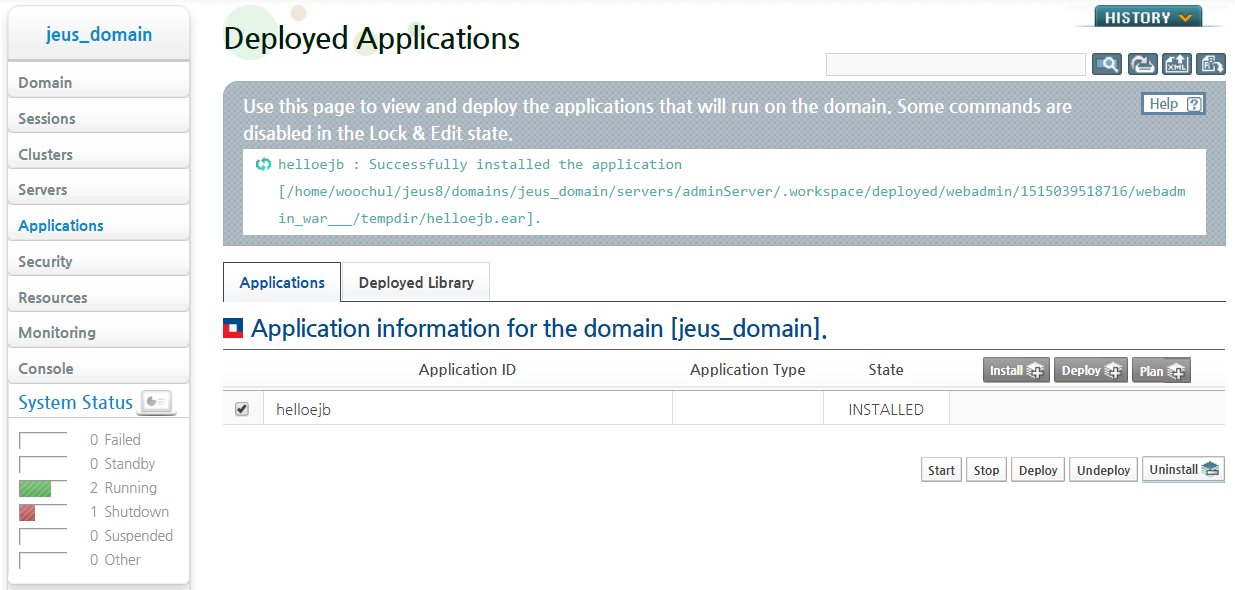
Click [install] from the Deployed Applications page.
-
Enter the ID in the 'Id' field of the Install page. Click [Browse...] next to the Path option to search for a target application and then click [OK].
-
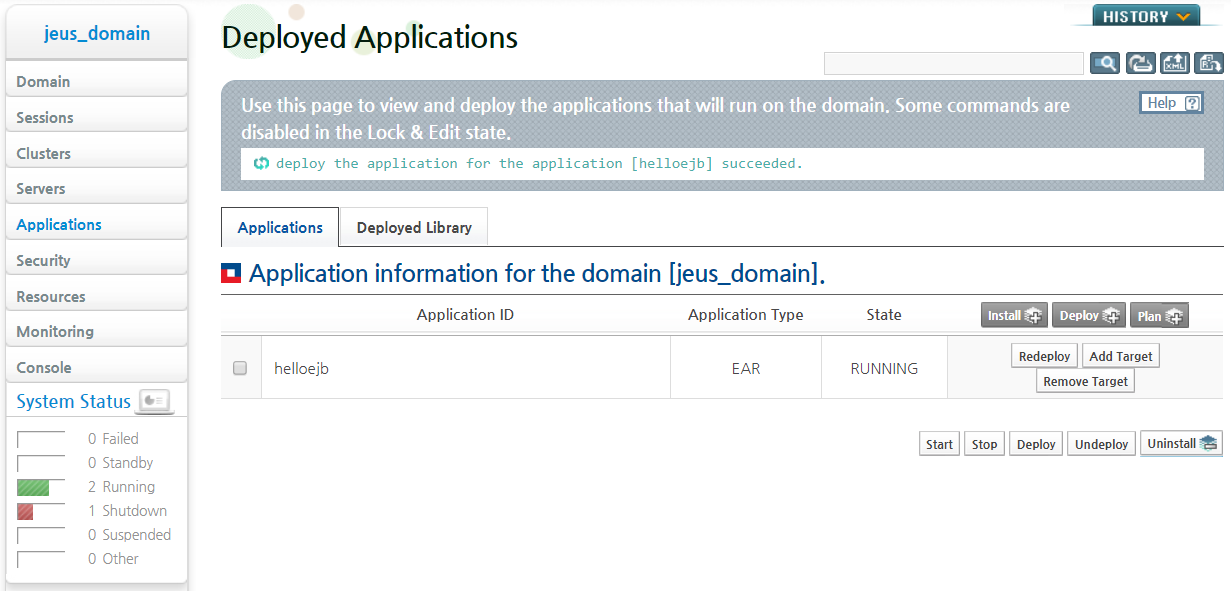
The list of applications deployed on DAS is shown on the Deployed Applications page. Click [Deploy] to deploy the application to an MS.
-
Select the server to deploy and click [OK]. It is possible to select DAS, but an MS is recommended for deployment.
-
The following message is displayed after the EJB application has been deployed successfully.
Deploying an EJB Application in the Console
This section describes how to deploy an EJB application in the console.
-
Find the helloejb.ear file that was created.
-
Log in to JEUS as jeusadmin.
jeusadmin johan –u administrator –p <password> -
Install the application on DAS.
[DAS]jeus_domain.adminServer>install-application -id helloejb C:\TmaxSoft\JEUS8\samples\getting_started\helloejb\dist\helloejb.ear
Successfully installed application[helloejb].
-
Deploy the application to an MS (Server1).
[DAS]jeus_domain.adminServer>deploy helloejb -servers server1
Succeeded to deploy the application : helloejb
This section describes how to execute and test the deployed application.
To execute HelloEJB:
-
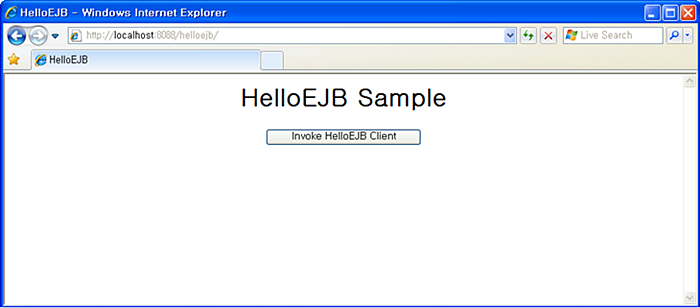
Open a browser window and enter the following URL into the address bar.
http://localhost:8088/helloejb/
-
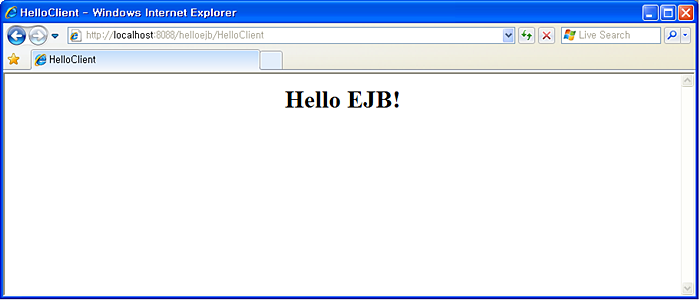
Click [Invoke HelloEJB Client] to execute the HelloClient servlet that invokes the EJB. The following result will appear.
This section describes how to develop an entity using the Java Persistence API and how to compile and deploy the entity.
EJB Example
The sample code consists of a product entity and the ProductManager session bean that processes the entity.
-
Entity
[Example 10.4] <<Product.java>>
package hellojpa; import java.io.Serializable; import javax.persistence.Entity; import javax.persistence.Id; import javax.persistence.NamedQuery; @Entity @NamedQuery(name="findAllProducts", query="SELECT p FROM Product p") public class Product implements Serializable { @Id private String productId; private double price; private String description; public Product() { } public Product(String productId, double price, String description){ this.productId = productId; this.price = price; this.description = description; } public String getProductId() { return productId; } public void setProductId(String id) { this.productId = id; } public double getPrice() { return price; } public void setPrice(double price) { this.price = price; } public String getDescription() { return description; } public void setDescription(String description) { this.description = description; } public String toString() { return "Product[productId=" + productId + ", price=" + price + ", description=" + description + "]"; } } -
Business Interface
[Example 10.5] <<ProductManager.java>>
package hellojpa; import java.util.Collection; import javax.ejb.Local; @Local public interface ProductManager { Product createProduct(String productId, double price, String desc); Product getProduct(String productId); Collection findAllProducts(); Collection findProductsByDescription(String desc); Collection findProductsInRange(double low, double high); void updateProduct(Product product); void removeProduct(Product product); void removeAllProducts(); } -
Bean Class
[Example 10.6] <<ProductManagerBean.java>>
package hellojpa;

import java.util.Collection;
import javax.ejb.Stateless;
import javax.persistence.EntityManager;
import javax.persistence.PersistenceContext;
import javax.persistence.Query;

@Stateless(mappedName="hellojpa.ProductManager")
public class ProductManagerBean implements ProductManager {
    @PersistenceContext
    private EntityManager em;

    public ProductManagerBean() {
    }

    public Product createProduct(String productId, double price, String desc){
        Product product = new Product(productId, price, desc);
        em.persist(product);
        return product;
    }

    public Product getProduct(String productId){
        return (Product)em.find(Product.class, productId);
    }

    public Collection findAllProducts() {
        return em.createNamedQuery("findAllProducts").getResultList();
    }

    public Collection findProductsByDescription(String desc){
        Query query = em.createQuery("SELECT p FROM Product p WHERE
            p.description=:desc");
        query.setParameter("desc", desc);
        return query.getResultList();
    }

    public Collection findProductsInRange(double low, double high){
        Query query = em.createQuery("SELECT p FROM Product p WHERE
            p.price between :low and :high");
        query.setParameter("low", low).setParameter("high", high);
        return query.getResultList();
    }

    public void updateProduct(Product product){
        Product managed = em.merge(product);
        em.flush();
    }

    public void removeProduct(Product product){
        Product managed = em.merge(product);
        em.remove(managed);
    }

    public void removeAllProducts(){
        em.createQuery("DELETE FROM Product p").executeUpdate();
    }
}
The sample file is in the following path.
JEUS_HOME/samples/getting_started/hellojpa/hellojpa-ejb/src/java/hellojpa
Servlet Client Example
A servlet client that saves and processes data in a database by using the ProductManager EJB is implemented as in the following.
[Example 10.7] <<ProductManagerClient.java>>
package hellojpa;

import java.io.*;
import java.util.Collection;
import javax.ejb.EJB;

import javax.servlet.*;
import javax.servlet.http.*;

public class ProductManagerClient extends HttpServlet {
    @EJB
    private ProductManager productManager;

    protected void processRequest(HttpServletRequest request,
        HttpServletResponse response)
    throws ServletException, IOException {
        response.setContentType("text/plain");
        PrintWriter out = response.getWriter();
        out.println("SERVLET CLIENT CONSOLE OUTPUT:\n");

        productManager.removeAllProducts();
        out.println("Cleaned up existing products.\n");

        out.println("Creating products...");
        Product p1 = productManager.createProduct("1", 10.00, "Ceramic Dog");
        Product p2 = productManager.createProduct("2", 13.00, "Wooden Duck");
        Product p3 = productManager.createProduct("3", 19.00, "Ivory Cat");
        Product p4 = productManager.createProduct("4", 33.00, "Ivory Cat");
        Product p5 = productManager.createProduct("5", 22.00, "Chrome Fish");

        Collection products;

        out.println("Created products:");
        products = productManager.findAllProducts();
        for(Object product : products){
             out.println(product);
        }
        out.println();

        out.println("Find product with productId 1:");
        Product pp1 = productManager.getProduct("1");
        out.println("Found = " + pp1.getDescription() + " $" + pp1.getPrice());

        out.println("Update the price of this product to 12.00");
        pp1.setPrice(12.00);
        productManager.updateProduct(pp1);

        Product pp2 = productManager.getProduct("1");
        out.println("Product " + pp2.getDescription() + " is now $" + pp2.getPrice());
        out.println();

        out.println("Find products with description:");
        products = productManager.findProductsByDescription("Ivory Cat");
        for(Object product : products){
            out.println(product);
        }
        out.println();

        out.println("Find products with price range between 10.00 and 20.00");
        products = productManager.findProductsInRange(10.00, 20.00);
        for(Object product : products){
            out.println(product);
        }
        out.println();

        out.println("Removed all products.");
        productManager.removeProduct(p1);
        productManager.removeProduct(p2);
        productManager.removeProduct(p3);
        productManager.removeProduct(p4);
        productManager.removeProduct(p5);

        out.close();
    }

    protected void doGet(HttpServletRequest request,
        HttpServletResponse response)
    throws ServletException, IOException {
        processRequest(request, response);
    }

    protected void doPost(HttpServletRequest request,
        HttpServletResponse response)
    throws ServletException, IOException {
        processRequest(request, response);
    }
}
The sample file is in the following path.
JEUS_HOME/samples/getting_started/hellojpa/hellojpa-war/src/java/hellojpa
The following are the steps for compiling the sample code using jant.
-
Execute the jant build command from the directory of the sample code file.
C:\TmaxSoft\JEUS8\samples\getting_started\hellojpa>jant build -
After the sample code has been built correctly, the 'dist/hellojpa.ear' EAR file is created.
Since this example requires a database, Derby must be running. Configure the database with the 'jdbc/sample' data source. For detailed information, refer to "Chapter 8. Configuring a JEUS System" .
After Derby has been started, create the following database table. In this example, a database named 'sample' is used.
CREATE TABLE PRODUCT (PRODUCTID VARCHAR(255) NOT NULL, PRICE FLOAT, DESCRIPTION VARCHAR(255), PRIMARY KEY (PRODUCTID)); -
Create the database table by executing the jant setup command as in the following.
C:\TmaxSoft\JEUS8\samples\getting_started\hellojpa>jant setup
Once the sample code has been built and the database has been set up, the packaged module is ready to be deployed.
A packaged EJB application can be deployed using WebAdmin or console.
Deploying an EJB Application in WebAdmin
This section describes how to deploy an EJB application in WebAdmin.
-
Log in to WebAdmin using a Web browser.
-
Click [Applications] from the left pane to go to the application list page.
Click [Install] on the Deployed Applications page.
-
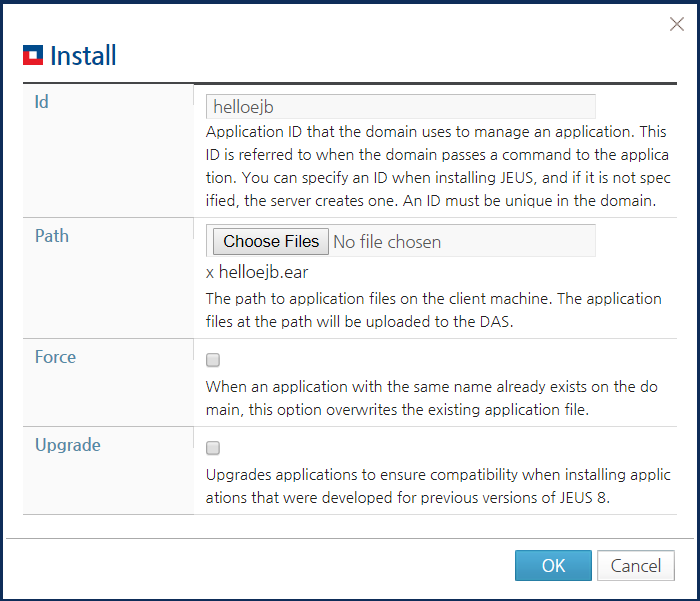
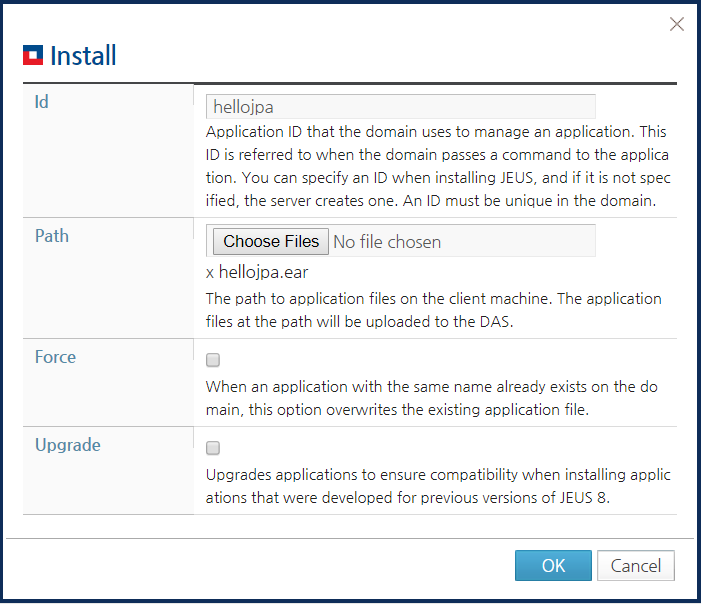
Enter the ID in 'Id' field of the Install page. Click [Choose Files] next to the Path option, select the newly created application, and then click [OK].
The path of the new application is 'JEUS_HOME/samples/getting_started/hellojpa/dist'.
-
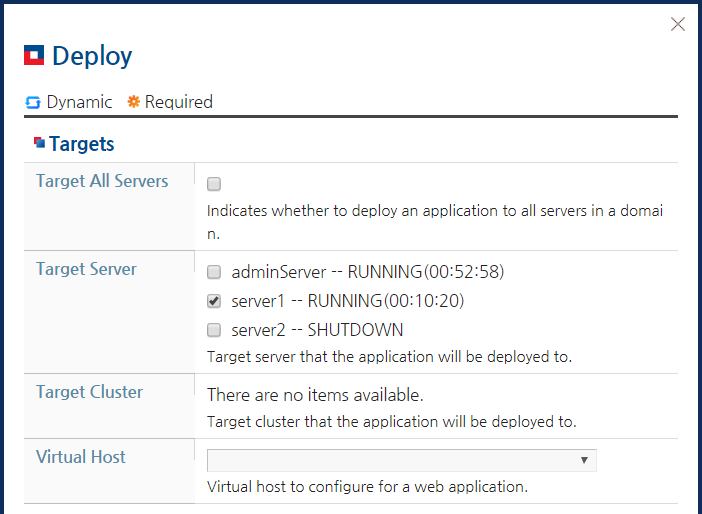
The list of applications deployed on DAS is shown on the Deployed Applications page. Click [Deploy] to deploy the application to an MS.
-
Select a server to deploy the application to from the Target Server list, and then click [OK]. Although both DAS and MS can be selected, it is recommended to deploy the application to an MS.
-
The following message is displayed after the web application has been deployed successfully.


Note
As discussed in"8.4. Adding Data Sources", deployment will fail if the data source is not configured correctly, such as having an incorrect password or IP address.
Deploying an EJB Application Using a Console Tool
This section describes how to deploy an EJB application in the console.
-
Log in to JEUS as jeusadmin.
jeusadmin –u administrator –p <password> -
Install the application on DAS.
[DAS]jeus_domain.adminServer>install-application -id hellojpa C:\TmaxSoft\JEUS8\samples\getting_started\hellojpa\dist\hellojpa.ear
Successfully installed application[hellojpa].
-
Deploy the application to an MS (Server 1).
[DAS]jeus_domain.adminServer>deploy hellojpa -servers server1
Succeeded to deploy the application : hellojpa
-
Verify that the application has been deployed successfully.
This section describes how to execute and test the deployed application.
To execute HelloJPA:
-
Open a browser window and enter the following URL into the address bar.
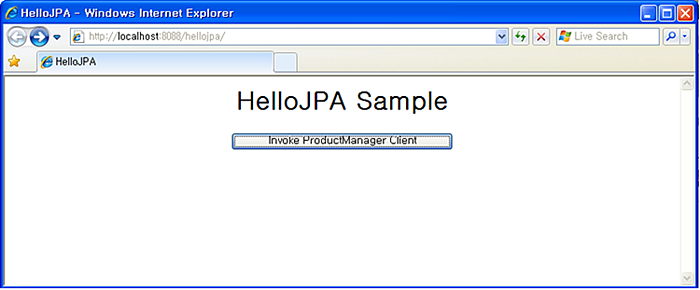
http://localhost:8088/hellojpa/
-
Click [Invoke ProductManager Client] to execute the HelloJPA servlet that invokes the EJB. The following result will appear.